Oh, where do I even begin with these brownies? For years, I’ve been on a quest for the *perfect* brownie – you know the kind. Not cakey, not dry, but that magical, melt-in-your-mouth texture that’s intensely chocolatey and has just the right amount of chew. I’ve tried so many recipes, tweaked countless ingredients, and honestly, I was starting to think my dream brownie was a myth. Then, a few years ago, my aunt shared this recipe with me, and folks, it changed everything. It’s the kind of recipe that instantly makes your kitchen smell like pure heaven, and the way these fudgy brownies moist chewy bars just disappear off the plate… well, let’s just say they’re a lifesaver on busy nights and a guaranteed crowd-pleaser at every gathering. Forget those fancy layered cakes for a moment; if you’re craving pure, unadulterated chocolate bliss, this is it. It’s my go-to when only the Absolute Best chocolate fix will do, and I’m so excited to share it with you.
Thank you for reading this post, don't forget to subscribe!What are Fudgy Brownies?
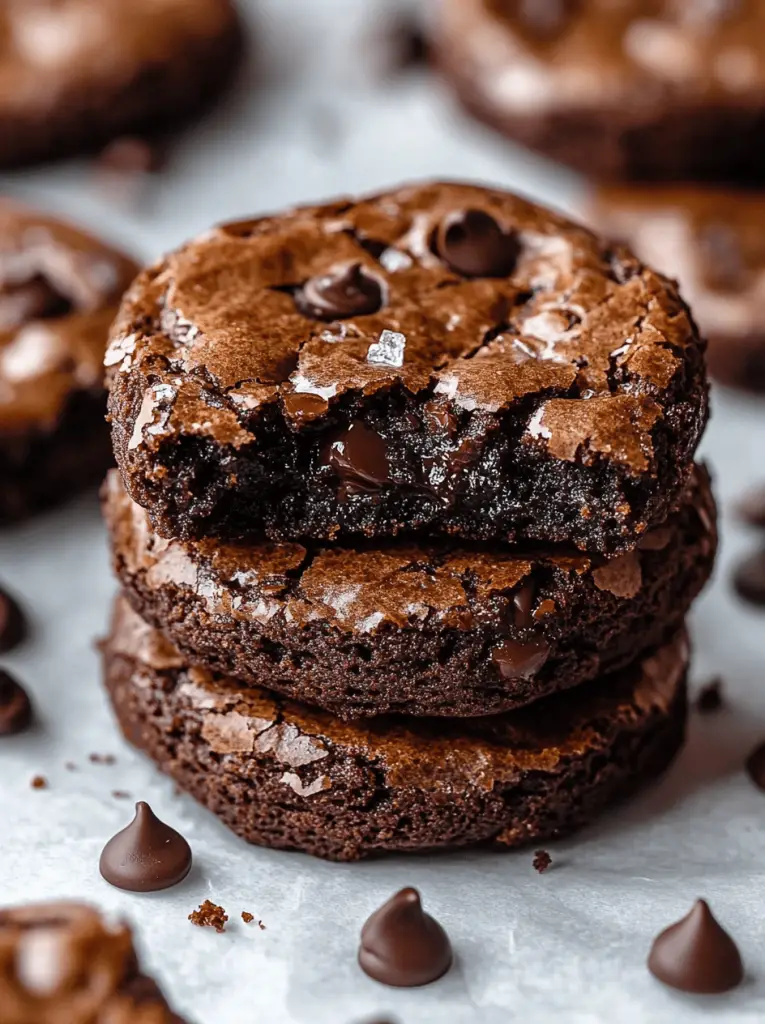
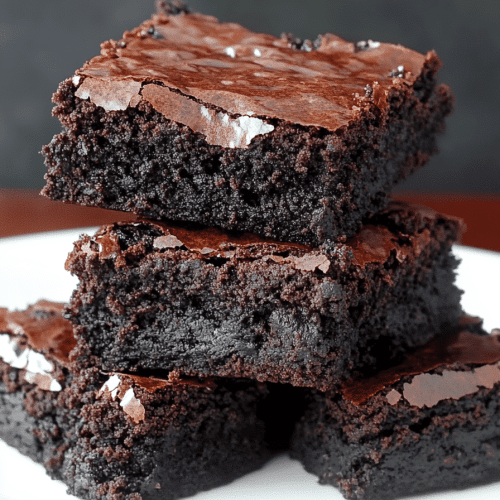
So, what makes these brownies so special? Think of them as the ultimate chocolate indulgence. They’re not just brownies; they’re an experience! The name itself, “fudgy brownies moist chewy,” really tells the whole story. We’re talking about a deep, rich chocolate flavor that’s incredibly intense, a texture that’s dense and fudgy right to the last bite, and that irresistible slight chewiness around the edges and a soft center. It’s essentially the brownie’s ideal state, achieved through a specific ratio of ingredients and a simple, foolproof method. They’re the kind of treat that makes you close your eyes with the first bite. I’ve always found that the best brownies strike a balance, and this recipe nails it every single time. It’s pure chocolate magic in bar form, and it’s surprisingly simple to whip up!
Why you’ll love this recipe?
There are so many reasons why this recipe has become my absolute favorite, and I just know you’re going to fall in love with it too. First off, the FLAVOR is out of this world. It’s a deep, dark chocolate that isn’t overly sweet, with just the right amount of richness. It truly satisfies that intense chocolate craving. Then there’s the SIMPLICITY. Honestly, this is one of the easiest brownie recipes I’ve ever made, and that’s saying something! There’s no fuss, no complicated steps, and you don’t need any fancy equipment. It’s perfect for when you’re short on time but desperately need a homemade treat. And let’s talk COST-EFFICIENCY. Most of the ingredients are pantry staples, making this a budget-friendly indulgence that doesn’t compromise on quality or taste. What I love most is its VERSATILITY. While they’re perfect on their own, you can totally jazz them up with nuts, chocolate chips, or a swirl of caramel. They’re also fantastic when served warm with a scoop of vanilla Ice Cream, making them suitable for any occasion, from a casual Tuesday evening to a more special dessert. Compared to other baked goods, these brownies are a quick win that delivers maximum deliciousness with minimal effort. They’re also so much better than any store-bought mix, and I say that with complete confidence!
How do I make fudgy brownies moist Chew
Quick Overview
This recipe is all about creating that perfect fudgy, moist, and chewy texture without any fuss. We’ll melt some butter and chocolate together, whisk in sugar and eggs until just combined, then gently fold in the dry ingredients. The key is not to overmix! A quick bake, a patient cool-down, and you’ll have the most incredible brownies you’ve ever tasted. It’s so straightforward, even if you’re new to baking, you’ll be amazed at how easily you can achieve bakery-quality results.
Ingredients
For the Main Batter:
Unsalted Butter: 1 cup (2 sticks), melted. Using unsalted butter gives you control over the saltiness. Make sure it’s good quality butter – it really makes a difference!
Bittersweet or Semisweet Chocolate: 8 ounces, finely chopped. I prefer a good quality bittersweet chocolate (around 60-70% cacao) for a richer flavor, but semisweet works wonderfully too. Using a mix of both is also fantastic if you’re feeling adventurous!
Granulated Sugar: 1 ½ cups. This contributes to the chewiness and sweetness. Don’t skimp here if you want that classic brownie experience.
Large Eggs: 3, at room temperature. Room temperature eggs incorporate better and create a smoother batter. This is a little trick I learned that really elevates the texture.
Vanilla Extract: 2 teaspoons. Pure vanilla extract adds a wonderful depth of flavor and enhances the chocolate.
All-Purpose Flour: 1 cup. We want just enough to bind everything together without making them cakey. Sifting it isn’t strictly necessary, but it can help ensure no lumps.
Unsweetened Cocoa Powder: ½ cup. This is where a lot of that deep chocolate flavor comes from. Use a good quality natural cocoa powder for the best results.
Salt: ½ teaspoon. Crucial for balancing the sweetness and bringing out the chocolate flavor.
Optional Mix-ins: ½ cup chocolate chips, chopped nuts (like walnuts or pecans).
“Made the Best Fudgy Brownies So Moist And Chewy tonight and wow — perfect weeknight dinner. Will definitely make again!”
For the Glaze (Optional but Highly Recommended!):
Powdered Sugar: 1 cup, sifted. Sifting is key for a smooth glaze.
Cocoa Powder: 2 tablespoons, sifted. Adds more chocolatey goodness.
Milk or Cream: 2-3 tablespoons. Start with 2 and add more until you reach your desired consistency. A little cream makes it extra rich!
Vanilla Extract: ½ teaspoon.
Step-by-Step Instructions
Step 1: Preheat & Prep Pan
Get your oven preheated to 350°F (175°C). Grab an 8×8 inch baking pan. I always line mine with parchment paper, leaving some overhang on the sides. This makes lifting the brownies out so much easier, and cleanup is a breeze! Make sure to grease the parchment paper and the exposed sides of the pan too, just to be safe.
Step 2: Mix Dry Ingredients
In a medium bowl, whisk together the flour, cocoa powder, and salt. Whisking them together ensures everything is evenly distributed and helps break up any lumps in the cocoa powder. Set this aside for now.
Step 3: Mix Wet Ingredients
In a heatproof bowl set over a saucepan of barely simmering water (a double boiler method), melt the butter and chopped chocolate together. Stir gently until it’s completely smooth. Be careful not to scorch the chocolate! Once melted and smooth, remove the bowl from the heat. Stir in the granulated sugar until well combined. Let this mixture cool slightly for about 5-10 minutes – you don’t want it too hot when you add the eggs. Once cooled a bit, whisk in the eggs one at a time, mixing until just incorporated after each addition. Then, stir in the vanilla extract.
Step 4: Combine
Now, pour the wet ingredients into the bowl with the dry ingredients. Using a rubber spatula, gently fold everything together until *just* combined. Seriously, stop mixing as soon as you no longer see streaks of dry flour. Overmixing is the enemy of fudgy brownies! If you’re adding chocolate chips or nuts, gently fold them in now.
Step 5: Prepare Filling
This step is for the optional, but incredibly delicious, swirl if you choose to do one. You can prepare a Simple Chocolate ganache or even just swirl in some melted chocolate chips. For a super simple swirl, I sometimes just melt down an extra ounce of chocolate and dollop it on top before swirling with a toothpick. The key is to have something decadent to swirl into the batter.
Step 6: Layer & Swirl
Pour the Brownie Batter into your prepared baking pan and spread it evenly. If you’re adding a swirl, now’s the time! Dollop your chosen filling (like ganache or extra chocolate chips) over the batter. Then, use a toothpick or a skewer to gently swirl it through the batter, creating beautiful marbled patterns. Don’t over-swirl, or you’ll lose the definition.
Step 7: Bake
Bake for 25-35 minutes. How do you know they’re done? The edges should look set, and a toothpick inserted into the center should come out with moist crumbs attached, but not wet batter. If it comes out clean, they might be a little overbaked for that perfect fudgy texture. Ovens vary, so keep an eye on them towards the end of the baking time. I usually check mine around the 25-minute mark.
Step 8: Cool & Glaze
This is arguably the hardest part: letting them cool! Let the brownies cool completely in the pan on a wire rack. This is crucial for them to set properly and achieve that dense, fudgy texture. Once they’re completely cool, prepare the glaze. In a small bowl, whisk together the sifted powdered sugar and cocoa powder. Add the milk or cream a tablespoon at a time, along with the vanilla, whisking until you have a smooth, pourable glaze. Drizzle or spread the glaze over the cooled brownies. Let the glaze set for at least 30 minutes before slicing.
Step 9: Slice & Serve
Once the glaze is set, use the parchment paper overhang to lift the entire brownie slab out of the pan. Place it on a cutting board. For the cleanest slices, use a sharp knife, wiping it clean between each cut. I love serving these slightly warm, but they are also delicious at room temperature. My kids actually prefer them after they’ve sat for a bit – they think the flavors meld even more!
What to Serve It With
These fudgy brownies are stars on their own, but they also play wonderfully with other flavors and textures! For a delightful BREAKFAST treat (yes, I’m a proponent of dessert for breakfast sometimes!), a cup of strong black coffee is the perfect counterpoint to the rich chocolate. They’re also great with a glass of cold milk. For BRUNCH, I love to serve them as part of a dessert platter. They look elegant when cut into neat squares and perhaps dusted with a little extra cocoa powder. A raspberry coulis or a dollop of whipped cream also makes them feel a bit more special. As a decadent DESSERT, there’s nothing better than a warm brownie topped with a scoop of vanilla bean ice cream or even a swirl of Salted Caramel. It’s pure bliss! And for those COZY SNACKS, when you just need something comforting, they are perfect with a mug of hot chocolate or a chai latte. My family also loves them with a side of fresh berries; the tartness of strawberries or raspberries really cuts through the richness beautifully.
Top Tips for Perfecting Your Fudgy Brownies
Over the years, I’ve picked up a few tricks that guarantee these fudgy brownies are always moist and chewy. Here are my top tips!
“Packed with flavor and so simple. Exactly what I wanted from this Best Fudgy Brownies So Moist And Chewy!”
Zucchini Prep: Wait, zucchini? Yes! The secret to incredibly moist brownies without them tasting like zucchini is all in the prep. Always grate your zucchini finely, and then squeeze out as much moisture as possible. I like to use a clean kitchen towel or cheesecloth for this. You want the pulp, but not the excess water, which can make your brownies soggy rather than moist.
Mixing Advice: This is HUGE. Do NOT overmix the batter once you add the flour. Mix just until the dry ingredients are incorporated. Overmixing develops the gluten in the flour, which leads to tough, cakey brownies. A few little lumps are actually better than a completely smooth batter that’s been overworked.
Swirl Customization: Don’t be afraid to get creative with your swirls! You can swirl in Peanut Butter, cream cheese, caramel, or even fruit preserves. Just make sure whatever you’re swirling is a similar consistency to melted chocolate or ganache so it blends well without creating pockets of liquid.
Ingredient Swaps: If you don’t have unsalted butter, you can use salted, but reduce the added salt in the recipe by ¼ teaspoon. For a dairy-free version, use a good quality vegan butter substitute. I’ve tested this with almond milk in the glaze and it was surprisingly creamy!
Baking Tips: Always use the correct pan size. Baking in a pan that’s too large will result in thinner brownies that bake too quickly and can become dry. Overbaking is the number one reason for dry brownies. Trust the toothpick test, but remember that moist crumbs are what you’re looking for, not wet batter.
Glaze Variations: If chocolate glaze isn’t your thing, a simple dusting of powdered sugar is elegant. You can also make a vanilla glaze, or even a LEMON GLAZE for a bright contrast. For a really intense chocolate flavor, add a tablespoon of espresso powder to the batter – it deepens the chocolate without making it taste like coffee.
Storing and Reheating Tips
Storing these brownies is pretty straightforward, but proper methods ensure they stay deliciously fudgy. At ROOM TEMPERATURE, they’re best stored in an airtight container. They usually stay fresh and moist for about 3-4 days. I’ve found that leaving them in the pan, covered tightly with plastic wrap, works perfectly well if you plan to eat them within a couple of days.
For REFRIGERATOR STORAGE, place them in an airtight container. They’ll last longer this way, typically for up to a week. The texture might become a bit firmer when cold, but don’t worry, they’ll soften up as they come to room temperature. I often find I prefer them slightly chilled on a hot day!
FREEZER INSTRUCTIONS are your friend if you want to make a big batch and save some for later. Wrap individual brownies or the whole pan tightly in plastic wrap, then in aluminum foil or place in a freezer-safe container. They can be stored for up to 2-3 months. To thaw, simply leave them at room temperature for a few hours or gently reheat. For REHEATING, you can pop a brownie in the microwave for about 10-15 seconds – just enough to warm it through and bring back that fudgy goodness. Be careful not to overheat, or they can become tough. The GLAGE TIMING Advice is simple: I always recommend glazing after the brownies have completely cooled. If you glaze them while they’re warm, the glaze will melt and become a runny mess. If you’re freezing them, you can either glaze before freezing or glaze them after thawing for the freshest look.
Frequently Asked Questions
Final Thoughts
I truly believe this recipe for fudgy brownies moist chewy bars is a keeper. It’s more than just a dessert; it’s a little piece of comfort and pure joy that you can create right in your own kitchen. The magic lies in its ability to deliver that intensely chocolatey, perfectly moist, and delightfully chewy experience every single time, with minimal effort. It’s the kind of recipe that makes people ask, “Wow, you made these?!” and that, to me, is the highest compliment. If you love rich, decadent chocolate and crave that perfect brownie texture, you absolutely have to give this a try. For those of you who enjoyed this recipe, you might also love my One-Bowl Chocolate Chip Cookie Recipe or my Decadent Flourless Chocolate Cake. They all share that same commitment to incredible flavor and satisfying chocolate cravings! I can’t wait to hear what you think, so please leave a comment below and let me know how your fudgy brownies turned out. Happy baking, everyone!
fudgy brownies moist chewy
Ingredients
Main Ingredients
- 4 large eggs
- 1.25 cups unsweetened cocoa powder
- 1 tsp baking powder
- 1 tsp espresso powder
- 1 tbsp vanilla extract
- 1 cup unsalted butter melted
- 2.25 cups granulated sugar
- 2 cups chocolate chips semi-sweet or preferred type
- 1.5 cups all-purpose flour
Instructions
Preparation Steps
- Preheat oven to 350°F (175°C). Grease a 9x13 inch baking pan.
- In a large bowl, beat together eggs, cocoa powder, baking powder, espresso powder, and vanilla extract until smooth.
- Melt the butter in a small microwave-safe bowl or a saucepan over low heat.
- Add the sugar to the melted butter and combine. Microwave the mixture in 10-15 second increments, mixing each time, until the mixture is hot (about 110-120°F or 43-49°C), but not bubbly. It should take on a shiny look when ready. This step helps dissolve the sugar for a shiny crust.
- Add the hot butter-sugar mixture to the egg mixture and mix until smooth.
- Microwave the chocolate chips in 20-second increments until fairly soft, but not totally melted, if you want them to remain as chunks in the brownies. If you prefer them fully incorporated, melt them completely.
- Add the flour and softened (or melted) chocolate chips to the batter and mix until just combined, being careful not to overmix.
- Pour the batter into the prepared pan and spread evenly. Bake for about 30 minutes, or until a toothpick inserted into the center comes out with just a few moist crumbs (not wet batter).
- When done, remove from oven and allow to cool completely on a wire rack before cutting and serving. This ensures fudgy, chewy brownies.


