Instant Pot Apple Crisp
There’s something magical about the first bite of a warm, gooey Apple Crisp—especially when it’s ready in under 15 minutes. I remember making this for my family last fall, and by the time we were halfway through the pot, everyone was already asking for seconds. The way the apples caramelize in the Instant Pot, bubbling gently under that golden oat streusel, creates this perfect balance of tender fruit and crunchy topping that feels like autumn in every spoonful. What makes this recipe extra special is how quickly it comes together: just prep, pressure, and enjoy. No oven required, no babysitting. It’s one of those comforting desserts you can whip up on a busy weeknight without sacrificing flavor or texture.
Thank you for reading this post, don't forget to subscribe!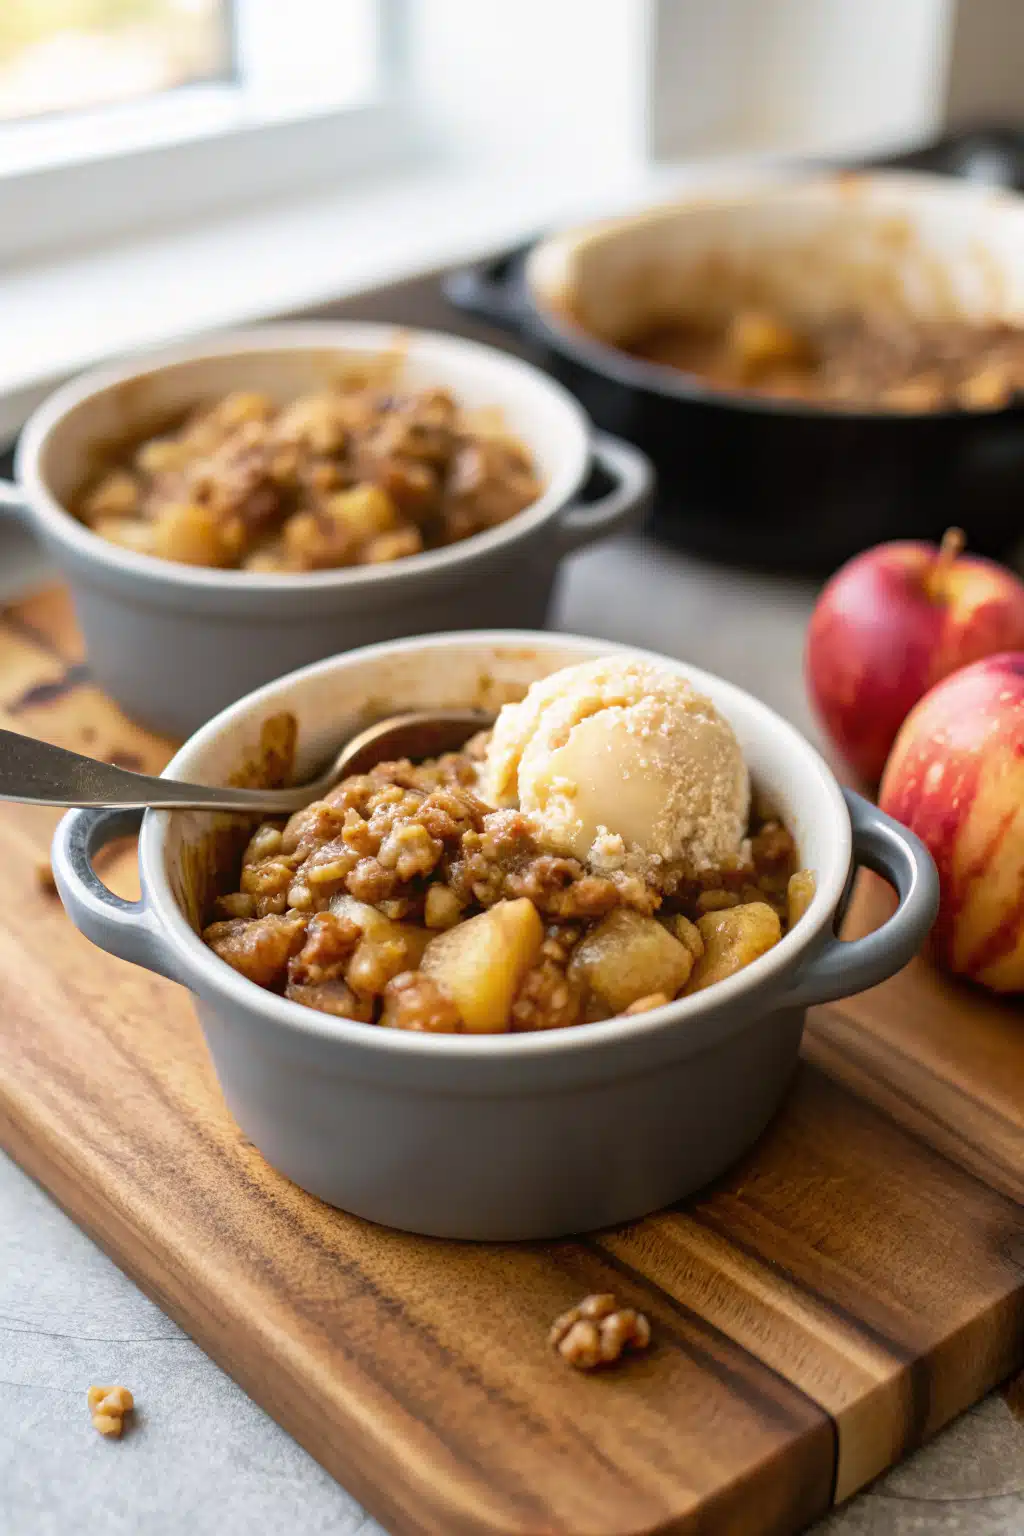
What Is Instant Pot Apple Crisp?
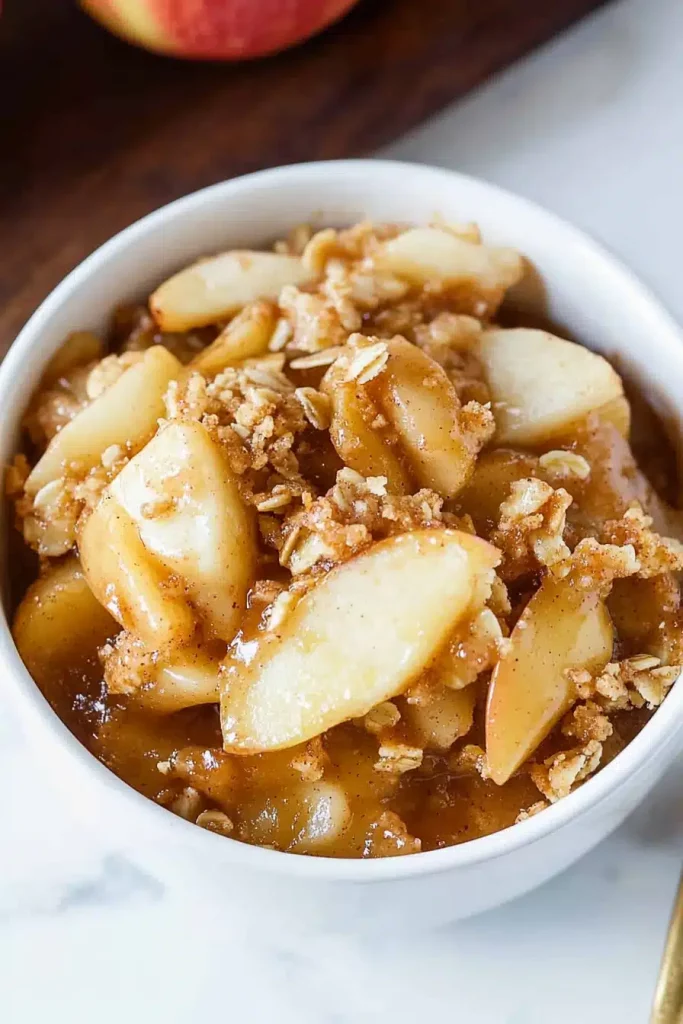
Instant Pot Apple Crisp is essentially a pressure cooker version of the classic fall favorite we all know and love—but with serious speed advantages. Instead of baking slowly in the oven for nearly an hour, this recipe uses your electric pressure cooker to cook down firm apples into tender, saucy perfection in just three minutes under high pressure. The magic happens because the sealed environment traps steam, which softens the fruit while keeping its shape (if you cut them right), and the Brown Sugar turns into a thick, spiced syrup that coats each bite. Topped with a buttery oat crumble studded with cinnamon and brown sugar, it transforms from simple fruit into something almost decadent. It’s not quite applesauce, not quite pie—it’s that sweet spot between comfort and convenience.
Why You’ll Love This Recipe
If you’ve ever been disappointed by mushy apples or a soggy topping, this recipe fixes both problems effortlessly. Because the cooking happens fast under pressure, you don’t end up with waterlogged fruit—just perfectly cooked Granny Smiths that still hold their structure. That means you get big chunks of apple mingling with that rich, spiced sauce, all topped with a crisp layer that stays crunchy thanks to the dry ingredients separating from the liquid until you’re ready to serve. Plus, it’s hands-off after prep: toss everything into the pot, lock the lid, and walk away. When the timer dings, you’ll have dessert ready to eat or share—no waiting around for heat to circulate evenly in an oven. Whether you’re feeding two or eight, this recipe scales beautifully and tastes like it was made hours ago, even though it took less time than boiling pasta.
How to Make Instant Pot Apple Crisp
Quick Overview
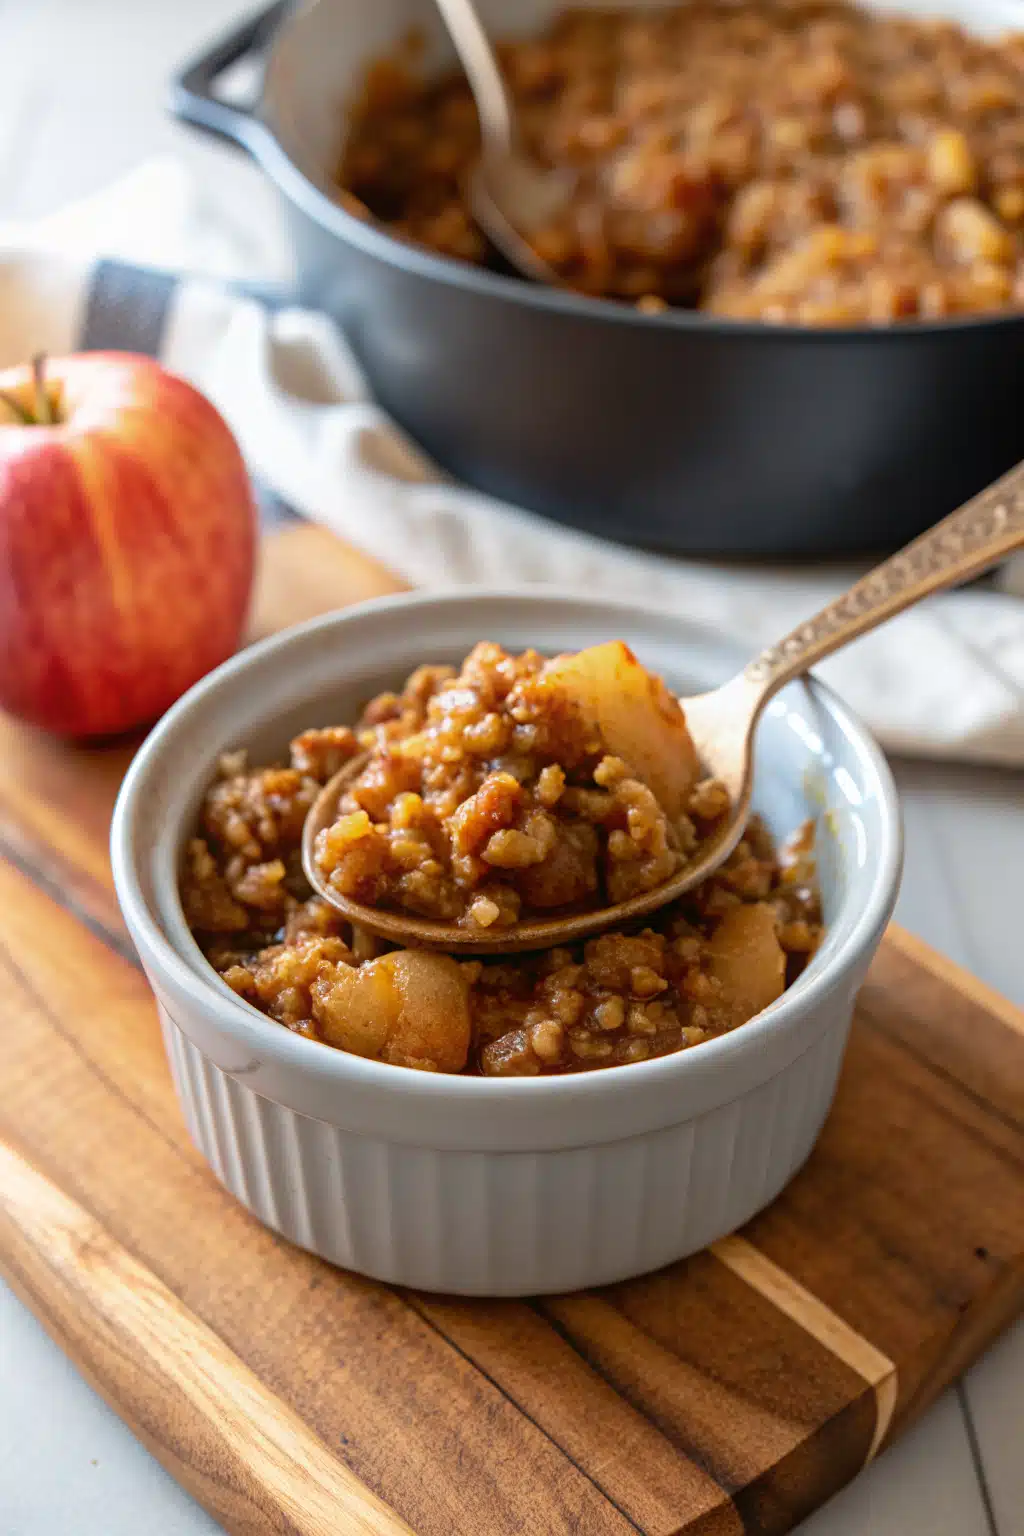
Making Instant Pot Apple Crisp is ridiculously easy. First, peel and cube your apples, then mix them with cinnamon, nutmeg, almond extract, and Brown Sugar in the pot. Add a splash of water to create steam, then top everything with a mixture of melted butter, old-fashioned oats, flour, more brown sugar, salt, and cinnamon. Lock the lid, set to high pressure for three minutes, and do a quick release when done. In under 15 minutes total, you’ve got warm, bubbling apple crisp straight from the pot—ready to devour with ice cream or caramel sauce.
“I don’t know if I’ve ever eaten a better Apple Crisp. The rub alone is wonderful, but the sauce??? Over the top!”
Ingredients
- For the apples:
- 6 large Granny Smith apples, peeled and cubed
- 1 teaspoon cinnamon
- ¼ teaspoon nutmeg
- ½ teaspoon almond extract
- ¼ cup light brown sugar, packed
- ½ cup water
- For the crisp topping:
- 4 tablespoons unsalted butter, melted
- ½ cup old fashioned oats
- ¼ cup all-purpose flour
- ½ cup light brown sugar, packed
- pinch kosher salt
- ½ teaspoon cinnamon

Step-by-Step Instructions
- Peel the apples and cut them into large chunks—bigger pieces prevent turning into sauce.
- In your 6-quart Instant Pot, combine the cubed apples, cinnamon, nutmeg, almond extract, and brown sugar. Stir gently to coat.
- Pour the water into the bottom of the pot—this creates the steam needed for pressure cooking.
- In a bowl, whisk together the melted butter, oats, flour, brown sugar, salt, and cinnamon until crumbly.
- Sprinkle the topping evenly over the apples; do not stir.
- Lock the lid securely and set the valve to sealing position. Cook on HIGH PRESSURE for exactly 3 minutes.
- Once finished, perform a QUICK RELEASE by moving the valve to venting. Carefully open the lid.
- Serve immediately while warm, ideally with a scoop of vanilla ice cream or drizzle of caramel sauce.
What to Serve It With
This apple crisp pairs beautifully with classic toppings that complement its warm, spiced flavor. A generous scoop of vanilla Ice Cream melts into the caramelized apples and adds creamy contrast, while a dollop of whipped cream keeps things lighter. But honestly? Don’t skip the caramel sauce—it elevates every bite with that sticky, buttery sweetness. If you prefer dairy-free options, coconut whipped cream works wonderfully too. For a grown-up twist, try serving it with a splash of heavy cream or a side of bourbon-spiked hot chocolate. And if you want to toast the topping for extra crunch, transfer portions to oven-safe bowls and broil for 2–3 minutes until golden.
Top Tips for Perfecting Your Instant Pot Apple Crisp
- Use firm apples: Granny Smiths hold up best during pressure cooking. Avoid overly ripe or soft varieties that break apart easily.
- Cut apples generously: Bigger chunks = firmer texture. Small cubes turn to mushy applesauce in the pressurized environment.
- Don’t stir after adding topping: Keeping the oat mixture dry ensures it stays crispy instead of soaking up moisture.
- Adjust cook time based on preference: Want firmer apples? Try 1 minute. Prefer softer fruit? Go up to 5 minutes.
- Prevent burn warnings: Sometimes bits of apple or residue stick to the bottom. If you see a “burn” message, open the lid, stir briefly, scrape the bottom, then resume cooking.
- Broil for browning: For extra crispy topping, spoon into ramekins and broil 2–3 minutes until bubbly and golden.
Storing and Reheating Tips
Leftovers keep well! Store covered in the refrigerator for up to 4 days. To reheat, microwave individual servings for about 1 minute until warmed through. You can also pop leftover portions back into the Instant Pot (without repressurizing) using the Sauté function on low with the lid off, stirring occasionally until heated. For best texture, avoid microwaving the entire batch at once—it tends to make the topping soggy. If you’re meal-prepping desserts, assemble the crisp ahead of time, refrigerate overnight, then finish cooking as directed. Just note that cold ingredients take slightly longer to come to pressure.
Frequently Asked Questions
“Made the Apple Crisp tonight and wow — perfect weeknight dinner. Will definitely make again!”
Final Thoughts
This Instant Pot Apple Crisp has become one of those recipes I reach for whenever the craving hits—whether it’s a cozy Sunday night or a sudden need for comfort food during a rainy afternoon. It’s forgiving, adaptable, and delivers that nostalgic taste of fall without any of the usual hassle. I especially love how it brings people together: my kids ask for it weekly, my husband always requests it when he comes home late, and friends rave about it whenever I bring it over. If you’ve been hesitant to try pressure-cooked desserts, this is the perfect gateway—because let’s be real, who wouldn’t want warm, saucy apples with a crunchy crown ready in minutes? Give it a shot, and let me know how it turns out. Trust me, your taste buds will thank you.

Instant Pot Apple Crisp
Ingredients
Main Ingredients
- 6 large Granny Smith apples (peeled and cubed)
- 1 teaspoon cinnamon
- 0.25 teaspoon nutmeg
- 0.5 teaspoon almond extract
- 0.25 cup light brown sugar (packed)
- 0.5 cup water
- 4 Tablespoons unsalted butter (melted)
- 0.5 cup old fashioned oats
- 0.25 cup all-purpose flour
- 0.5 cup light brown sugar (packed)
- 0.04 pinch kosher salt
- 0.5 teaspoon cinnamon
Instructions
Preparation Steps
- Peel and cube apples into large chunks or slices. Combine with cinnamon, nutmeg, almond extract and brown sugar in the Instant Pot. Add water. Stir until combined.
- Make the topping in a bowl by combining melted butter with oats, flour, brown sugar, kosher salt, and cinnamon. Sprinkle on TOP of the apples, but do not stir.
- Lock the lid in place and select HIGH PRESSURE for a cook time of 3 minutes. When done cooking, do a quick release.
- Serve warm with ice cream and caramel sauce!


