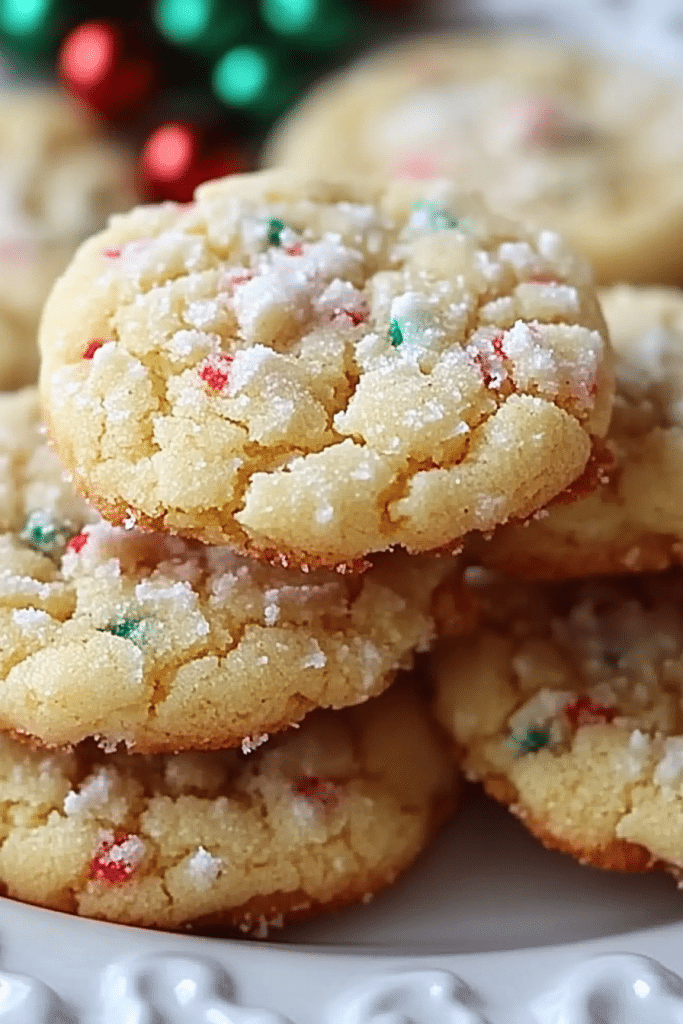
Oh, friends, gather ‘round! I’ve got a secret I’ve been itching to share, a recipe that’s practically legendary in my family, whispered about at potlucks, and requested endlessly by anyone who’s ever had the good fortune to taste one. I’m talking about the glorious, the divine, the utterly irresistible Gooey Butter Cookies. If you’ve ever had a craving for something sweet that’s both incredibly comforting and surprisingly sophisticated, these are your answer. They’re like a little bite of heaven, a soft, sweet cloud with a slightly chewy edge that just melts in your mouth. Honestly, they make even a Tuesday feel like a special occasion. Forget those dry, crumbly cookies that disappoint; these gooey butter cookies are in a league of their own, and I can’t wait for you to experience them!
Thank you for reading this post, don't forget to subscribe!What is gooey butter cookie?
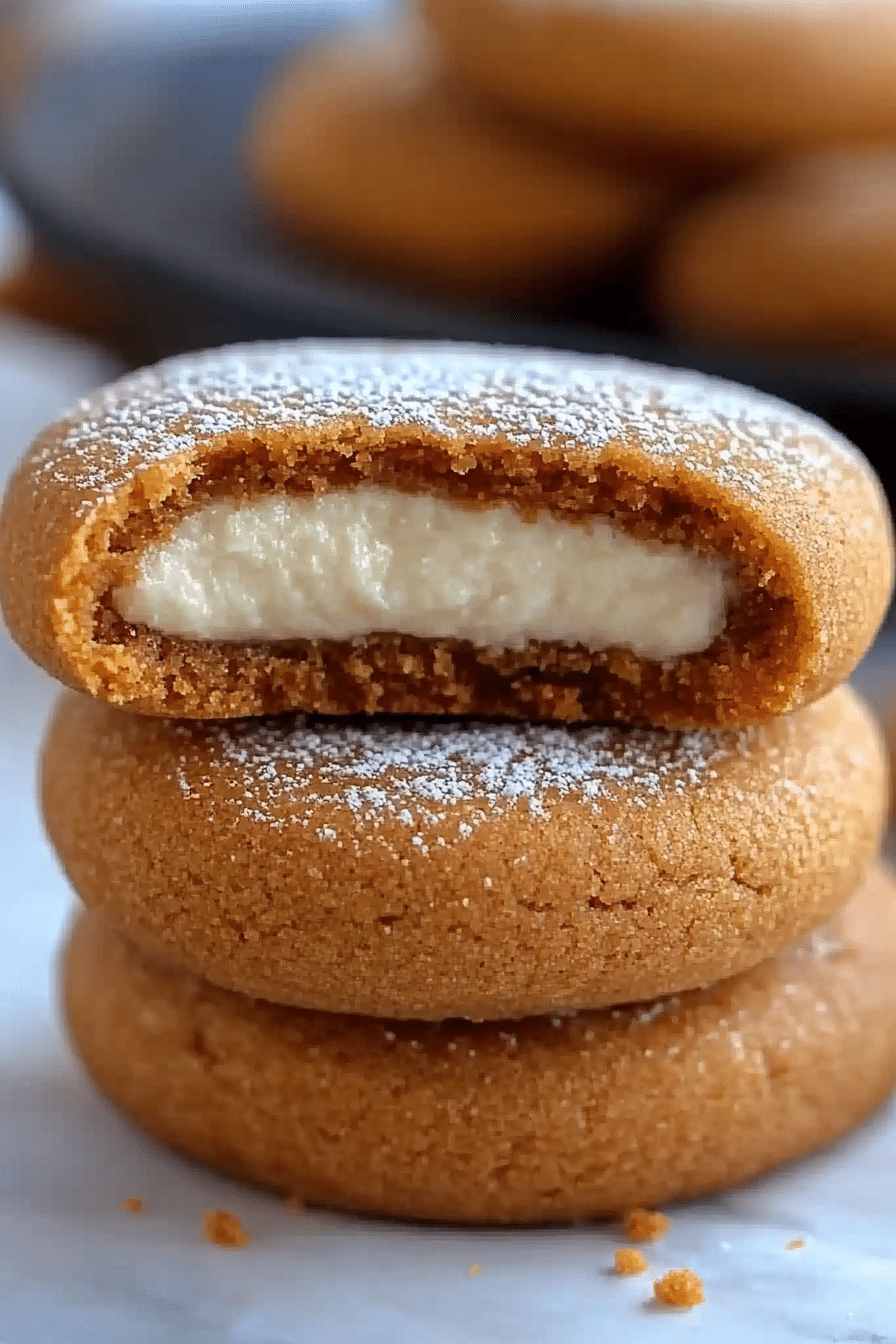
So, what exactly are these magical treats? Think of them as a cross between a classic shortbread and a rich, decadent blondie, all rolled into a perfectly portioned cookie. The name really does say it all – they are wonderfully gooey in the center, with a beautiful, slightly crisp edge that provides just the right amount of contrast. They hail from St. Louis, Missouri, a place known for its unique culinary contributions, and this cookie is definitely one of its shining stars. It’s not your everyday cookie; it’s something special. They have a dense, fudgy texture that’s completely addictive. The base is a tender, buttery dough, and it’s topped with a sweet, cream-cheese-based filling that bakes up into this luxurious, almost custard-like layer. It’s truly a sensory experience, and one bite will tell you why they’re so beloved.
Why you’ll love this recipe?
There are so many reasons why this gooey butter cookie recipe has become my absolute go-to. First and foremost, the flavor is out of this world. It’s intensely buttery, perfectly sweet, and that hint of cream cheese adds a subtle tang that just balances everything beautifully. It’s not overly sweet, which is something I really appreciate. And the texture? Oh, the texture! It’s that perfect combination of soft, chewy, and slightly fudgy that is just pure bliss. What I love most about this recipe, though, is its surprising simplicity. You might look at the ingredients and think it’s complicated, but trust me, it comes together so quickly, and the results are far more impressive than the effort involved. This is one of those recipes that makes you look like a baking superstar without breaking a sweat. It’s also incredibly cost-effective; the ingredients are all pantry staples, making it a perfect treat when you want something special without spending a fortune. And the versatility! These cookies are fantastic on their own, but they’re also amazing served warm with a scoop of vanilla ice cream, or even crumbled over a bowl of fresh berries. They’re my lifesaver on busy nights when everyone needs a little pick-me-up, and my kids literally ask for them all the time. If you’ve ever made my classic shortbread or my famous fudgy brownies, you’ll appreciate the depth of flavor and the satisfying chew these gooey butter cookies deliver.
How do I make gooey butter cookies?
Quick Overview
Making these gooey butter cookies is a two-part process, but don’t let that intimidate you! We’ll first create a simple, tender cookie base, and then we’ll whip up a quick, luscious filling that gets spread on top before baking. The magic happens in the oven, where everything melds together into that signature gooey, irresistible texture. It’s incredibly straightforward, and I promise, the aroma that fills your kitchen will be worth every second. The beauty of this recipe is its forgiving nature; even if you’re new to baking, you can achieve fantastic results. It’s a recipe I’ve made countless times, and it never fails to impress.
Ingredients
For the Main Batter:
1 cup (2 sticks) unsalted butter, softened (using good quality butter really makes a difference here!)
1/2 cup granulated sugar
1 large egg
1 teaspoon vanilla extract (pure vanilla extract is key for the best flavor!)
2 cups all-purpose flour
1/4 teaspoon salt
For the Filling:
1 package (8 ounces) cream cheese, softened (full-fat works best for creaminess)
1 cup powdered sugar (also known as confectioners’ sugar)
1 large egg
1 teaspoon vanilla extract
For the Glaze:
1 1/2 cups powdered sugar
2-3 tablespoons milk (or heavy cream for an extra rich glaze)
1/2 teaspoon vanilla extract (optional, but I love it)
“I don’t know if I’ve ever eaten a better Gooey Butter Cookies. The rub alone is wonderful, but the sauce??? Over the top!”
Step-by-Step Instructions
Step 1: Preheat & Prep Pan
First things first, preheat your oven to 350°F (175°C). You’ll want to line a 9×13 inch baking pan with parchment paper, leaving some overhang on the sides. This makes lifting the finished cookies out so much easier! Lightly grease the parchment paper or spray it with non-stick cooking spray. This step ensures your cookies won’t stick and will peel away beautifully.
Step 2: Mix Dry Ingredients
In a medium bowl, whisk together the all-purpose flour and salt. This ensures the salt is evenly distributed, which is important for flavor. Just give them a good stir with a whisk until they’re well combined. Set this aside for now.
Step 3: Mix Wet Ingredients
In a large bowl, cream together the softened unsalted butter and granulated sugar using an electric mixer until light and fluffy. This usually takes about 2-3 minutes. Then, beat in the large egg and vanilla extract until everything is well incorporated. Make sure your egg is at room temperature; it incorporates better that way. If you forget, you can place it in a bowl of warm water for 5-10 minutes.
Step 4: Combine
Gradually add the dry ingredients (the flour and salt mixture) to the wet ingredients, mixing on low speed until just combined. Be careful not to overmix here! We want to develop the gluten as little as possible to keep the cookies tender. Stop mixing as soon as you no longer see streaks of flour. The dough will be thick and soft.
Step 5: Prepare Filling
In a separate bowl, beat the softened cream cheese until smooth and creamy. This is key to avoiding lumps in your filling. Gradually beat in the powdered sugar until well combined. Then, mix in the egg and vanilla extract until the filling is smooth and luscious. It should be thick but spreadable.
Step 6: Layer & Swirl
Press the cookie dough evenly into the bottom of your prepared baking pan. It might be a little sticky, so you can use your hands or the bottom of a glass. Don’t worry about making it perfectly smooth; it’s a rustic cookie! Then, dollop spoonfuls of the cream cheese filling evenly over the cookie dough. Using a knife or an offset spatula, gently swirl the filling into the dough. You don’t need to fully combine them; just create beautiful marble-like patterns. I love seeing those swirls before they bake!
Step 7: Bake
Bake in the preheated oven for 25-35 minutes, or until the edges are lightly golden brown and the filling is set. The center might still look a little soft, and that’s exactly what we want for that gooey texture. You can test for doneness by gently touching the center; it should feel slightly firm but still have a slight give. Be careful not to overbake, or you’ll lose that signature gooeyness.
Step 8: Cool & Glaze
Let the cookies cool in the pan on a wire rack for at least 15-20 minutes before you even think about glazing them. This is crucial! They need to set up a bit. While they’re cooling, whisk together the powdered sugar, milk (start with 2 tablespoons and add more if needed), and vanilla extract until you have a smooth, pourable glaze. If it’s too thick, add a tiny bit more milk; if it’s too thin, add a bit more powdered sugar. Once the cookies have cooled slightly, drizzle the glaze evenly over the top.
“New family favorite! This Gooey Butter Cookies was so flavorful and ridiculously easy. Crowd-pleaser for sure.”
Step 9: Slice & Serve
Allow the glaze to set for another 10-15 minutes before slicing the cookies into squares or bars. I like to cut mine into generous portions because, well, they’re that good! These are best served at room temperature or slightly warm. The gooey center is truly at its best when it’s just been baked.
What to Serve It With
These gooey butter cookies are so versatile, they fit into almost any occasion. For breakfast, imagine them alongside a steaming mug of coffee or a glass of cold milk – it’s like a little sweet treat to start your day right. I love serving them cut into smaller squares for a more restrained morning indulgence. For brunch, they add a touch of elegance to any spread. Present them on a pretty platter with some fresh fruit, and they’ll be a guaranteed hit. They’re a perfect contrast to savory brunch items. As a dessert, they’re pure magic. Serve a warm square with a scoop of good quality vanilla bean ice cream, and you have a dessert that rivals any fancy restaurant offering. The warm, gooey cookie with cold ice cream is a match made in heaven. For cozy snacks, these are simply unbeatable. Curl up on the couch with a good book and a gooey butter cookie – it’s the ultimate comfort food experience. My family loves these after dinner, especially on a chilly evening; they just feel so warm and inviting. I’ve also found they pair wonderfully with a cup of hot tea or even a small glass of milk for the kids. They’re a real crowd-pleaser, no matter how you serve them.
Top Tips for Perfecting Your Gooey Butter Cookies
I’ve made these Gooey Butter Cookies more times than I can count, and over the years, I’ve picked up a few tricks that I think really elevate them. First, **using room temperature ingredients for both the base and the filling is non-negotiable.** It ensures everything emulsifies beautifully and you get a smooth, consistent texture without any lumps. For the base, make sure your butter is truly softened, not melted. If it’s too soft, you can end up with a greasy cookie. For the filling, really take the time to beat the cream cheese until it’s completely smooth before adding the powdered sugar – this is the secret to a velvety filling. When it comes to mixing the base, **do not overmix!** Once the flour is added, mix only until just combined. Overmixing develops the gluten, which can lead to tough cookies. I always stop as soon as I don’t see any dry flour streaks. For the swirl, you don’t need to be an artist. Just dollop the filling and gently drag a knife or spatula through it a few times to create an imperfect, beautiful pattern. The more rustic, the better, in my opinion! If you’re looking for flavor variations, I’ve experimented with adding a bit of almond extract to the filling alongside the vanilla, which is lovely, or even a sprinkle of cinnamon to the base. For baking, **pay attention to your oven.** Ovens can vary, so keep an eye on the cookies. The edges should be lightly golden, and the center should be set but still slightly soft. It’s better to underbake slightly than to overbake, as they’ll continue to firm up as they cool, and we want that gooey center. For the glaze, consistency is key. You want it thick enough to coat but thin enough to drizzle. Start with less liquid and add more gradually until you reach your desired consistency. If you accidentally make it too thin, just whisk in a bit more powdered sugar. If it’s too thick, a splash more milk will do the trick. I’ve found that waiting for the cookies to cool *slightly* before glazing is best; if they’re too hot, the glaze will just melt into them. But if they’re completely cold, the glaze might set too quickly. A little bit of warmth is perfect. Don’t be afraid to experiment with the glaze too! A little lemon zest can add a nice brightness, or a touch of espresso powder can give it a mocha twist. The possibilities are really endless with these simple, delicious cookies.
Storing and Reheating Tips
One of the best things about these gooey butter cookies is how well they keep, making them perfect for making ahead. For **room temperature storage**, I usually keep them in an airtight container at room temperature for up to 3 days. They stay wonderfully gooey. I don’t glaze them until just before serving if I plan to store them for more than a day, as the glaze can sometimes get a little sticky over time. For **refrigerator storage**, you can keep them in an airtight container for up to a week. The texture will firm up a bit in the fridge, so I highly recommend letting them come back to room temperature for about 20-30 minutes before serving if you want that signature gooeyness. For **freezer instructions**, these cookies freeze beautifully! You can freeze them either before baking (unbaked dough pressed into the pan) or after baking and glazing. If freezing the baked cookies, cut them into squares, wrap each square tightly in plastic wrap, then place them in a freezer-safe bag or container. They’ll last for up to 2-3 months in the freezer. To thaw, simply unwrap them and let them come to room temperature. If you froze the unbaked dough, you can bake them directly from frozen, adding a few extra minutes to the baking time. For the **glaze timing**, if you’re freezing baked cookies, it’s best to glaze them *after* thawing them. This ensures the glaze stays fresh and vibrant. If you’re just storing them for a day or two, glazing them right after they cool slightly is perfectly fine.
Frequently Asked Questions
Final Thoughts
Honestly, these Gooey Butter Cookies are more than just a dessert; they’re a little slice of happiness. They’re the perfect balance of rich, buttery goodness and that irresistible gooey texture that just makes you want to close your eyes with every bite. They’re simple enough for a weeknight treat but special enough to wow guests at any gathering. I hope you give them a try and that they bring as much joy to your kitchen as they do to mine. If you love rich, indulgent cookies, I also highly recommend checking out my famous Pecan Sandies recipe – they’re another family favorite! Can’t wait to hear how your Gooey Butter Cookies turn out! Please leave a comment below and let me know what you think, or share your own fun variations. Happy baking!
Gooey Butter Cookies
Ingredients
Main Ingredients
- 0.5 cup Unsalted butter, softened
- 1 package Cream cheese, softened 8 ounces
- 1 teaspoon Vanilla extract
- 0.5 teaspoon Almond extract
- 1 package Yellow cake mix 18.25 ounces
- 2 large Eggs
- 1 cup Powdered sugar for dusting
Instructions
Preparation Steps
- Preheat oven to 350°F (175°C). Line a baking sheet with parchment paper.
- In a large bowl, cream together the softened butter and cream cheese until smooth.
- Beat in the vanilla extract and almond extract.
- Add the dry yellow cake mix to the wet ingredients and mix until just combined. The dough will be thick and slightly sticky.
- In a separate bowl, whisk the eggs.
- Gradually add the beaten eggs to the dough, mixing until fully incorporated.
- Drop rounded tablespoons of dough onto the prepared baking sheet, leaving about 2 inches between cookies.
- Bake for 9-12 minutes, or until the edges are lightly golden and the centers are still soft and gooey.
- Let the cookies cool on the baking sheet for a few minutes before transferring them to a wire rack to cool completely.
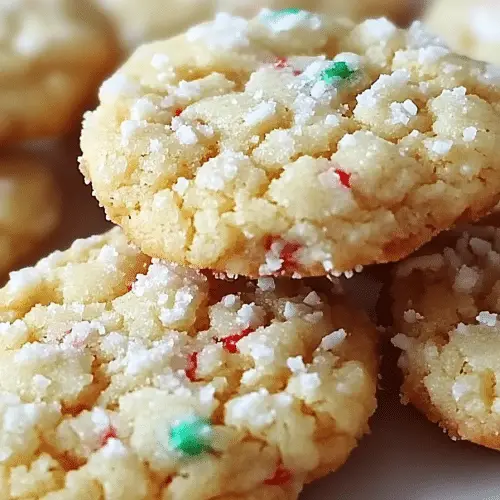
- Once cooled, generously dust the cookies with powdered sugar.