Okay, friends, gather ’round because I’m about to share a recipe that has completely stolen my heart, and I have a feeling it’s going to steal yours too. It’s called the Oreo Earthquake Cake, and honestly, the name barely does it justice. Imagine a chocolate lover’s dream swirled with the addictive crunch of Oreos, all baked into a ridiculously moist and decadent cake. This isn’t just another chocolate cake; it’s an experience. The first time I made this, it was a chaotic Tuesday evening, and I needed a serious pick-me-up. I remember the smell filling my kitchen, a rich, chocolatey aroma with that hint of something special from the Oreos, and I just knew I was onto something good. It’s the kind of dessert that makes you feel like you’re indulging in something truly extraordinary, even though it’s surprisingly simple to pull off. If you’ve ever had a deep, dark chocolate craving that only a truly spectacular cake can satisfy, this Oreo Earthquake Cake is your answer. It’s got that homemade goodness that’s miles beyond anything store-bought, and trust me, it’s a total crowd-pleaser. My family devours it whenever I make it, and my kids have already declared it their absolute favorite.
Thank you for reading this post, don't forget to subscribe!What is an Oreo Earthquake Cake?
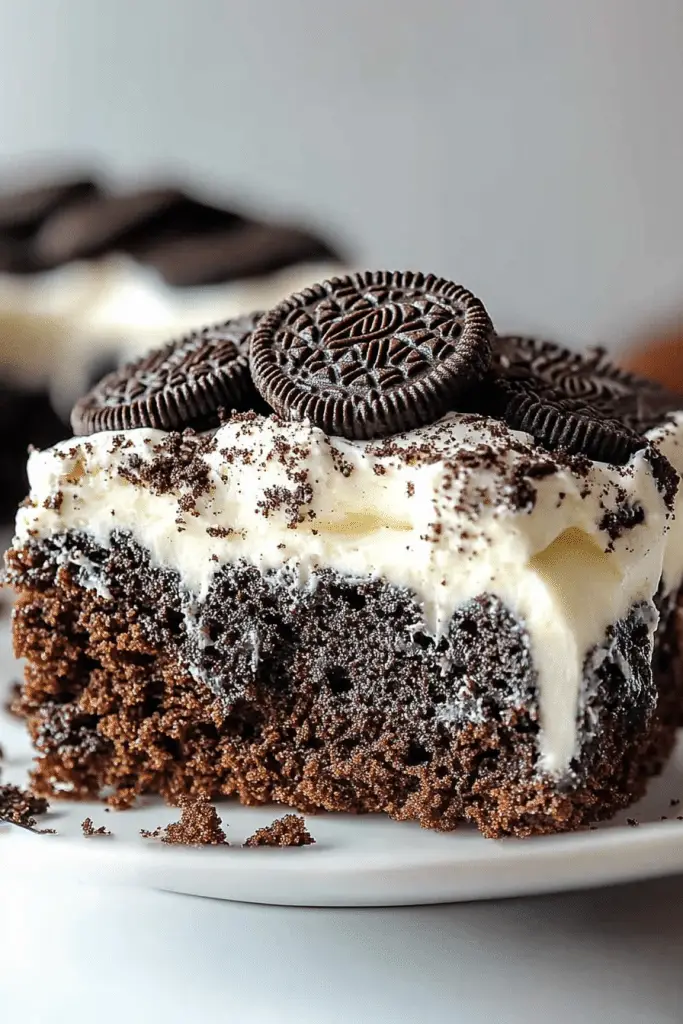
So, what exactly is this magical creation we’re calling the Oreo Earthquake Cake? Think of it as a super-moist, intensely chocolatey cake that has generous pockets and swirls of crushed Oreos baked right into it. The “earthquake” part comes from the way the Oreos tend to sink and spread a bit during baking, creating those irresistible, lava-like streaks and craggy bits throughout the cake. It’s not a perfectly uniform cake; it’s wonderfully messy and beautifully imperfect. The concept is simple: take a fantastic chocolate cake base, add a whole lot of crushed Oreos (and sometimes even whole ones for an extra surprise!), and bake it until it’s moist, fudgy, and utterly divine. It’s like a chocolate cake had a wild party with a package of Oreos and the result is pure delicious chaos. It’s comforting, it’s indulgent, and it’s exactly what you need when you’re craving something truly special but don’t have hours to spend in the kitchen.
Why you’ll love this recipe?
Honestly, picking my favorite part about this Oreo Earthquake Cake is tough because there are so many things to adore! Firstly, the flavor is just out of this world. You get that deep, rich chocolate from the cake itself, which is intensely satisfying, but then you get these delightful bursts of Oreo flavor and texture. It’s that perfect combination of moist cake and crunchy cookie bits that just melts in your mouth. And the texture! It’s so incredibly moist, almost fudgy, thanks to a few secret ingredients I always use. It’s never dry, which is a huge win in my book for any chocolate cake. Then there’s the simplicity factor. While it looks like something you’d get from a fancy bakery, it’s surprisingly straightforward to make. You don’t need any fancy techniques, just a few bowls and a whisk. This is one of those lifesaver recipes for busy weeknights or when you need a dessert in a pinch. Plus, it’s incredibly budget-friendly! You likely have most of the ingredients in your pantry already, and Oreos are usually on sale. It’s a win-win for your taste buds and your wallet. What I truly love most about this Oreo Earthquake Cake, though, is its versatility. You can serve it as is, or get fancy with a simple chocolate glaze or a dusting of powdered sugar. It’s also fantastic for birthdays, potlucks, or just because. It doesn’t compete with other desserts like a traditional layered cake might; it just stands tall, a glorious, chocolatey monument to simple joy. If you love my Fudgy Brownie recipe.What is the best thing about Oreos?
How to Make Oreo Earthquake Cake
Quick Overview
Making this Oreo Earthquake Cake is a breeze! You’ll whisk together your wet and dry ingredients for a rich chocolate batter, then prepare your dreamy Oreo filling. The magic happens when you layer the batter and filling, swirling them together before baking. It’s designed to be fuss-free, so don’t stress about perfection. The “earthquake” effect is part of its charm! You’ll end up with a show-stopping cake that’s incredibly moist and packed with Oreo goodness, all with minimal effort.
Ingredients
For the Main Batter:
You’ll need all-purpose flour for structure, granulated sugar and a touch of brown sugar for that lovely moisture and sweetness, unsweetened cocoa powder (Dutch-processed gives the richest flavor!), baking soda and baking powder for lift, and salt to balance all that sweetness. For the wet ingredients, we’ll use eggs, milk (buttermilk is my secret weapon for extra tenderness!), vegetable oil for supreme moisture, and pure vanilla extract. A touch of hot water or coffee at the end really blooms the cocoa, intensifying that chocolate flavor!
For the Filling:
This is where the earthquake happens! You’ll need a package of your favorite Oreos, roughly crushed. Don’t go too fine; you want some discernible cookie pieces for texture. Some people like to add a bit of cream cheese or a spoonful of peanut butter to the filling for an extra layer of flavor, but honestly, just the crushed Oreos are divine.
For the Glaze:
A simple chocolate ganache made with good quality semi-sweet chocolate chips and heavy cream is perfection. You could also do a simple powdered sugar glaze with a splash of milk and vanilla. For a richer finish, a cream cheese frosting is also a fantastic option!
“New family favorite! This Oreo Earthquake Cake was so flavorful and ridiculously easy. Crowd-pleaser for sure.”
Step-by-Step Instructions
Step 1: Preheat & Prep Pan
First things first, let’s get our oven preheated to 350°F (175°C). Now, grab your baking pan – a 9×13 inch rectangular pan is perfect for this cake. I like to grease it really well with butter or cooking spray, and then dust it lightly with cocoa powder. This not only prevents sticking but also adds an extra little chocolatey layer. You can also line the bottom with parchment paper if you’re feeling extra cautious about sticking.
Step 2: Mix Dry Ingredients
In a large mixing bowl, whisk together your flour, granulated sugar, brown sugar, cocoa powder, baking soda, baking powder, and salt. You want to make sure everything is thoroughly combined and there are no lumps of cocoa or baking soda. Whisking well at this stage helps ensure an evenly leavened and textured cake. It also means no surprises of bitter baking soda patches!
Step 3: Mix Wet Ingredients
In a separate medium bowl, whisk together your eggs, milk (buttermilk is truly the best here for extra tenderness!), vegetable oil, and vanilla extract until they are well combined. The oil is key for that incredible moisture, don’t skip it! And make sure your milk isn’t straight from the fridge if possible, room temperature is ideal.
Step 4: Combine
Now, pour the wet ingredients into the bowl with the dry ingredients. Mix everything together until *just* combined. Don’t overmix! Overmixing can develop the gluten too much, leading to a tougher cake. A few streaks of flour are okay at this point. Then, carefully pour in the hot water or hot coffee. This seems strange, but it’s a classic chocolate cake trick that blooms the cocoa powder, intensifying the chocolate flavor and making the batter super smooth and thin. Mix on low speed or stir gently until the batter is smooth. It will be quite liquidy, and that’s exactly what we want!
Step 5: Prepare Filling
While the batter is resting, let’s get our Oreo filling ready. Take your Oreos and crush them up. You can do this in a zip-top bag with a rolling pin, or pulse them a few times in a food processor. You don’t want a fine powder; aim for a mix of crumbs and small cookie chunks. This is what gives you those delightful crunchy bits in every bite.
Step 6: Layer & Swirl
Pour about half of the chocolate batter into your prepared pan. Sprinkle about half of the crushed Oreos evenly over the batter. Now, pour the remaining batter on top, spreading it gently to cover the Oreos. Sprinkle the rest of the crushed Oreos over the top. Then, take a knife or a skewer and gently swirl the Oreos into the batter. Don’t over-swirl; you want distinct pockets and streaks of Oreo goodness, not a muddy mess. This is the “earthquake” action!
Step 7: Bake
Pop that pan into your preheated oven. Bake for about 30-40 minutes. The exact time will depend on your oven, so keep an eye on it. You’ll know it’s done when a toothpick inserted into the center comes out with moist crumbs attached, but no wet batter. Remember, this cake is meant to be moist, so you don’t want it bone dry.
Step 8: Cool & Glaze
Once it’s out of the oven, let the cake cool in the pan on a wire rack for at least 15-20 minutes. This is crucial for the cake to set up properly. While it’s cooling, prepare your glaze. If you’re making a ganache, gently warm the heavy cream (don’t boil it!) and pour it over the chocolate chips. Let it sit for a minute, then whisk until smooth and glossy. If using a powdered sugar glaze, just whisk together powdered sugar, milk, and vanilla until you get your desired consistency. Once the cake is slightly cooled but still a little warm, pour or spread the glaze over the top. The warmth of the cake will help the glaze spread beautifully.
“I don’t know if I’ve ever eaten a better Oreo Earthquake Cake. The rub alone is wonderful, but the sauce??? Over the top!”
Step 9: Slice & Serve
Allow the glaze to set a bit before slicing. I find it’s best served slightly warm or at room temperature. Slice it into generous squares, and watch everyone’s eyes light up. The combination of the rich chocolate cake, the gooey Oreo swirls, and the decadent glaze is pure bliss. It’s a cake that brings smiles to faces, every single time.
What to Serve It With
This Oreo Earthquake Cake is so wonderfully versatile, it fits into almost any occasion! For a delightful breakfast treat that feels like a weekend indulgence, serve a small, warm slice alongside a steaming mug of coffee. The rich chocolate pairs beautifully with a bold brew. For a more elegant brunch, cut it into slightly smaller, neater squares and present them on a tiered stand. A side of fresh berries, like raspberries or strawberries, adds a lovely pop of color and freshness. When serving it as a dessert, it truly shines. A scoop of good quality vanilla bean ice cream or a dollop of whipped cream takes it to the next level. For a cozy snack time, especially on a chilly afternoon, a generous slice with a cold glass of milk is pure comfort. I’ve even served it with a drizzle of salted caramel sauce when we’ve had guests, and it was a huge hit! My kids, of course, are happy with it as is, often demanding a second slice after dinner.
Top Tips for Perfecting Your Oreo Earthquake Cake
Alright, let’s talk about making this cake absolutely perfect. First off, for the Oreos, I’ve found that crushing them to a mix of fine crumbs and some chunkier bits gives the best textural experience. Don’t be tempted to make them into a powder; those little pockets of cookie are crucial for the “earthquake” effect. When it comes to mixing the batter, remember my golden rule: *do not overmix*. Seriously, once the dry and wet ingredients are just combined, stop. A few tiny streaks of flour are fine; they’ll disappear in the oven. Overmixing is the quickest way to a tough cake, and we want this one to be incredibly tender and moist. For that swirl, less is often more. You don’t want to fully blend the Oreos into the batter. Think of it as creating ribbons and pockets of deliciousness. A gentle swirl with a knife or skewer is all you need to achieve that beautiful marbled effect. I’ve learned this the hard way after making a cake that was just… muddy brown! For ingredient swaps, if you don’t have buttermilk, you can easily make a substitute by adding 1 tablespoon of white vinegar or lemon juice to 1 cup of regular milk, letting it sit for 5-10 minutes. It works like a charm! I also tested this with brewed coffee instead of hot water, and oh my goodness, the chocolate flavor was even more intense. Baking can be tricky, and ovens vary wildly. My best advice is to start checking for doneness around the 30-minute mark. Use the toothpick test, but remember, moist crumbs are good! If your cake seems to be browning too quickly on top, you can loosely tent it with aluminum foil for the last 10-15 minutes of baking. For the glaze, if it’s too thick, add a tiny bit more cream or milk, a teaspoon at a time. If it’s too thin, let it sit for a few minutes, or whisk in a little more powdered sugar or melted chocolate. Consistency is key, and it’s usually an easy fix!
Storing and Reheating Tips
Storing this delicious Oreo Earthquake Cake is pretty straightforward, thankfully! If you have any leftovers (which is rare in my house!), they’ll keep wonderfully at room temperature for about 2-3 days. Just make sure to cover the cake pan tightly with plastic wrap or transfer slices to an airtight container. This helps to keep it from drying out. If you need to store it for longer, the refrigerator is your best bet. It will stay good in the fridge for up to a week. Again, keep it well-covered. When you’re ready to enjoy a slice that’s been in the fridge, I always recommend letting it come to room temperature for about 20-30 minutes before serving. The flavors and textures are so much better when it’s not ice cold. If you want to reheat a slice, you can pop it in the microwave for about 10-15 seconds. It just warms it up gently and makes it taste freshly baked. For freezing, this cake holds up quite well! You can freeze the un-glazed cake or individual slices. Wrap them very tightly in plastic wrap, then in a layer of aluminum foil. It should stay good in the freezer for up to 2-3 months. To thaw, unwrap it and let it come to room temperature on the counter. If you plan to glaze it after freezing, it’s best to glaze it *after* it has thawed. If you’ve already glazed it, just freeze the glazed cake, and let it thaw completely at room temperature before serving. The glaze might soften slightly upon thawing, but it’s still absolutely delicious!
Frequently Asked Questions
Final Thoughts
I really hope you give this Oreo Earthquake Cake a try. It’s truly a special recipe that brings so much joy, whether you’re baking it for a big occasion or just because you deserve a treat. It’s that perfect balance of rich chocolate, satisfying crunch, and incredible moistness that makes it a real winner. What I love most is that it looks and tastes so impressive, yet it’s so forgiving and easy to make. It’s the kind of cake that makes people ask for the recipe, and you can proudly say, “Oh, it’s my go-to!” If you’re a fan of decadent chocolate treats, I think you’ll also adore my recipe for Decadent Chocolate Lava Cakes – they’re another favorite for a reason! I can’t wait to hear what you think of this Oreo Earthquake Cake. Please leave a comment below to share your thoughts, your own tips, or how it turned out for you. And if you make it, snap a pic and tag me on social media – I love seeing your baking adventures!
Oreo Earthquake Cake
Ingredients
Chocolate Cake
- 1.75 cup all-purpose flour
- 2 cup granulated sugar
- 0.75 cup unsweetened cocoa powder
- 1.5 teaspoon baking soda
- 1 teaspoon baking powder
- 1 teaspoon salt
- 2 large eggs
- 1 cup milk
- 0.5 cup vegetable oil
- 2 teaspoon vanilla extract
- 1 cup boiling water
Cheesecake Swirl
- 8 ounces cream cheese, softened
- 0.5 cup granulated sugar
- 1 large egg
- 0.5 teaspoon vanilla extract
Oreo Crumble
- 24 cookies Oreo cookies, crushed
Instructions
Preparation Steps
- Preheat oven to 350°F (175°C). Grease and flour a 9x13 inch baking pan.
- In a large bowl, whisk together flour, sugar, cocoa powder, baking soda, baking powder, and salt.
- In a separate bowl, whisk together eggs, milk, oil, and vanilla extract.
- Add the wet ingredients to the dry ingredients and mix until just combined. Gradually stir in the boiling water until the batter is smooth.
- In a medium bowl, beat together softened cream cheese and sugar until smooth. Beat in the egg and vanilla extract until well combined.
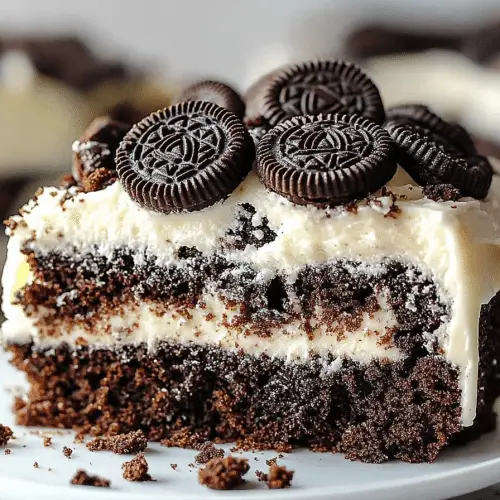
- Pour half of the chocolate cake batter into the prepared baking pan. Dollop spoonfuls of the cream cheese mixture over the batter. Sprinkle half of the crushed Oreos over the cream cheese.
- Pour the remaining chocolate cake batter over the top. Dollop the remaining cream cheese mixture and sprinkle with the remaining crushed Oreos. Use a knife or skewer to gently swirl the cream cheese and Oreos into the cake batter, creating an 'earthquake' effect.
- Bake for 35-45 minutes, or until a wooden skewer inserted into the center comes out with moist crumbs attached.
- Let the cake cool in the pan for at least 20 minutes before slicing and serving.