Oh, where do I even begin with these cinnamon crescent rolls? They’re more than just a sweet treat for me; they’re practically a hug in baked form. I remember my mom making these on lazy weekend mornings, the whole house filling with that impossibly cozy aroma of cinnamon and sugar. It’s a smell that instantly transports me back, and honestly, the taste is just as magical. They’re similar to a Cinnamon Roll, of course, but there’s something about the lightness and the way they bake up with those flaky layers that makes them uniquely special. If you’ve ever wanted something that feels a bit indulgent but is surprisingly simple to whip up, these are your ticket. They’re my absolute favorite when I’m craving something sweet but don’t want the fuss of a more complicated pastry. These cinnamon crescent rolls are a lifesaver, truly!
Thank you for reading this post, don't forget to subscribe!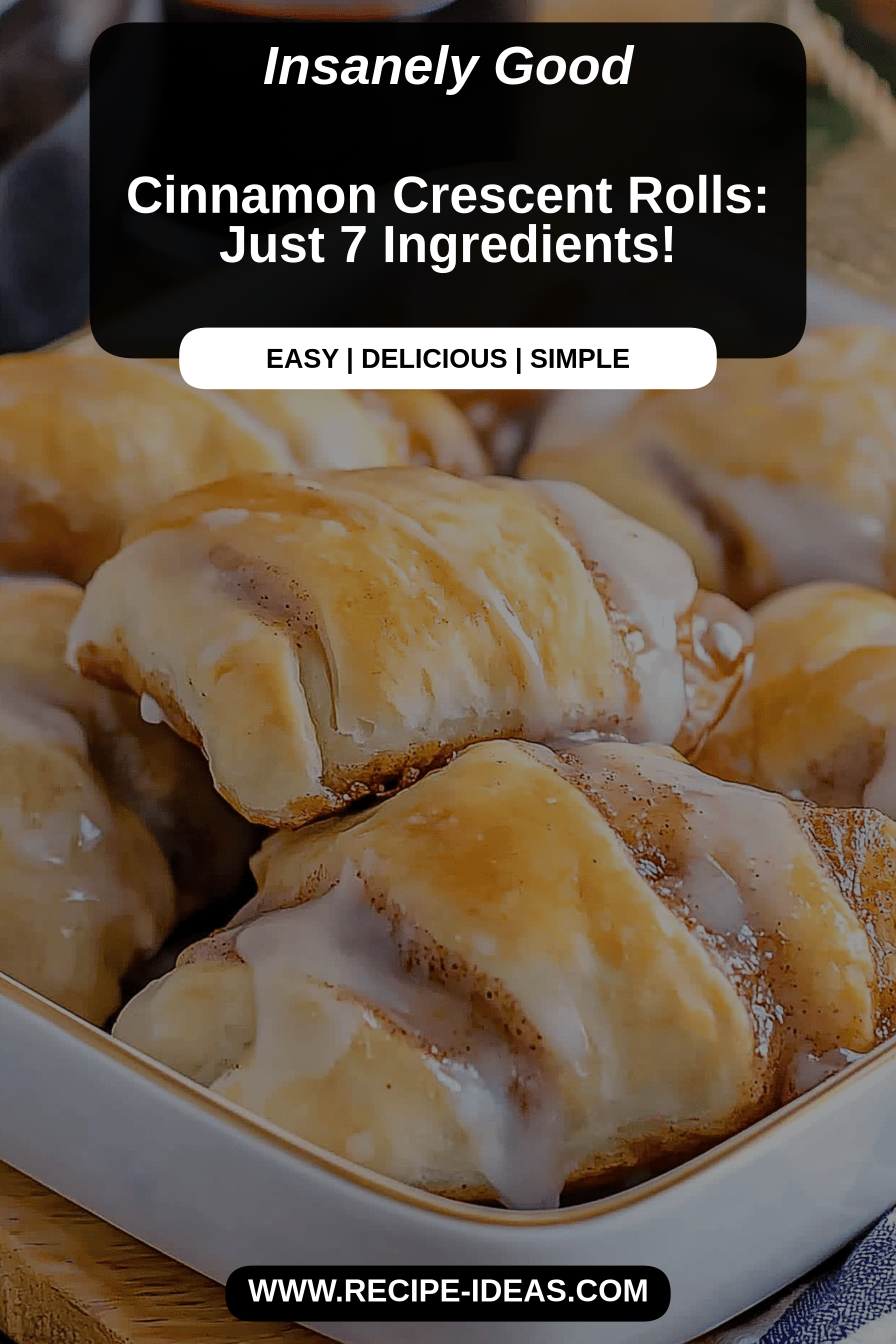
What are cinnamon crescent rolls?
So, what exactly are these little wonders? Think of them as the softer, more tender cousin to your traditional Cinnamon Roll. Instead of a thick dough, we’re working with a slightly lighter, enriched dough that bakes up incredibly tender and almost melts in your mouth. The name comes from the way they’re shaped, often rolled into crescent shapes before baking, though I usually go for more of a pinwheel or spiral myself. The magic happens with a generous swirl of butter, sugar, and plenty of cinnamon right in the center, creating those irresistible ribbons of flavor. They’re essentially little pockets of pure, unadulterated comfort, perfect for any time you need a little pick-me-up. It’s the kind of baking that feels like a treat for yourself and everyone you share it with.
Why you’ll love this recipe?
There are so many reasons why this recipe has become a staple in my kitchen, and I just know you’re going to adore it too. First off, let’s talk about the flavor. That classic combination of sweet, buttery dough with that warm burst of cinnamon is simply irresistible. It’s not overpoweringly sweet, which I really appreciate; it’s just perfectly balanced. Then there’s the simplicity. Honestly, these are so much easier to make than you might think! The dough comes together quickly, and the rolling and swirling is actually kind of fun and therapeutic. I’ve tried other recipes that require complex dough-handling, but this one is forgiving and straightforward, even if you’re not a seasoned baker. Plus, the ingredients are all pantry staples, making this a budget-friendly indulgence. I often make these for unexpected guests, and they always disappear in minutes. What I love most about this recipe is its versatility. They’re fantastic warm with a cup of coffee, but they also make a delightful quick dessert after dinner, or even a special treat for a holiday brunch. They’re not as heavy as some other pastries, so you can enjoy them without feeling too weighed down. It’s this perfect blend of comforting flavor, ease of preparation, and pure deliciousness that makes me come back to these cinnamon Crescent Rolls again and again.
How do you make cinnamon rolls?
Quick Overview
This recipe is all about creating a wonderfully tender dough, swirling it with a luscious cinnamon-sugar filling, and baking them until golden brown and fragrant. It’s a straightforward process that starts with a simple dough, followed by a delightful rolling and filling stage, and ends with a quick bake. The whole thing comes together relatively fast, making it perfect for a spontaneous craving or a special weekend breakfast without all the fuss. Trust me, the aroma alone is worth the effort!
Ingredients
For the Main Batter:
Here’s what you’ll need to get that lovely, soft dough going:
– 1 cup (240ml) whole milk, warmed (not hot, just lukewarm – think bathwater temperature!)
– 2 ¼ teaspoons (1 packet) active dry yeast
– ½ cup (100g) granulated sugar
– 1 large egg, at room temperature
– ½ cup (113g) unsalted butter, melted and slightly cooled
– 1 teaspoon vanilla extract
– 3 ½ cups (438g) all-purpose flour, plus more for dusting
– ½ teaspoon salt
For the Filling:
This is where the real magic happens!
– ½ cup (113g) unsalted butter, softened (crucial for easy spreading!)
– ¾ cup (150g) packed light Brown Sugar
– 2 tablespoons ground cinnamon (use good quality, it makes a difference!)
– Pinch of salt
For the Glaze:
Just a simple drizzle to finish them off beautifully.
– 1 cup (120g) powdered sugar
– 2-3 tablespoons milk (or cream for extra richness)
– ½ teaspoon vanilla extract
Step-by-Step Instructions
Step 1: Preheat & Prep Pan
First things first, let’s get your oven ready. Preheat it to 375°F (190°C). While that’s happening, grab a 9×13 inch baking pan and give it a good grease. I usually use butter or non-stick cooking spray. This prevents our beautiful rolls from sticking, and nobody wants to scrape their precious baked goods off a pan!
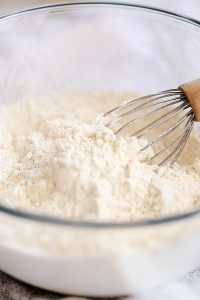
Step 2: Mix Dry Ingredients
In a large bowl, whisk together the 3 ½ cups of all-purpose flour and the ½ teaspoon of salt. Make sure they’re well combined. This ensures the salt is evenly distributed, which is key for flavor balance. Set this aside for now.
Step 3: Mix Wet Ingredients
In a separate bowl (or the bowl of your stand mixer, if you’re using one), combine the warmed milk and the 2 ¼ teaspoons of active dry yeast. Let it sit for about 5-10 minutes. You should see it get a little foamy; that’s how you know your yeast is alive and ready to work its magic! If it doesn’t foam, your yeast might be old, and you’ll want to start over with fresh yeast.
“New family favorite! This cinnamon crescent rolls was so flavorful and ridiculously easy. Crowd-pleaser for sure.”
Step 4: Combine
To the foamy yeast mixture, add the ½ cup of granulated sugar, the room-temperature egg, the melted and slightly cooled butter, and the vanilla extract. Give it a good whisk until everything is nicely incorporated. Now, gradually add the dry ingredients (the flour and salt mixture) to the wet ingredients. Mix until just combined and a soft dough forms. Be careful not to overmix! Overmixing can lead to tough rolls, and we want them light and tender. The dough will be a bit sticky at this stage; that’s perfectly okay!
Step 5: Prepare Filling
While the dough is resting slightly, let’s whip up that delicious filling. In a medium bowl, combine the ½ cup of softened butter, ¾ cup of packed light Brown Sugar, 2 tablespoons of cinnamon, and a pinch of salt. Mix it all together with a fork or a spatula until it’s a well-combined, spreadable paste. If your butter is too hard, it won’t spread easily, and if it’s too melty, it will just run out everywhere. Softened is the key!
Step 6: Layer & Swirl
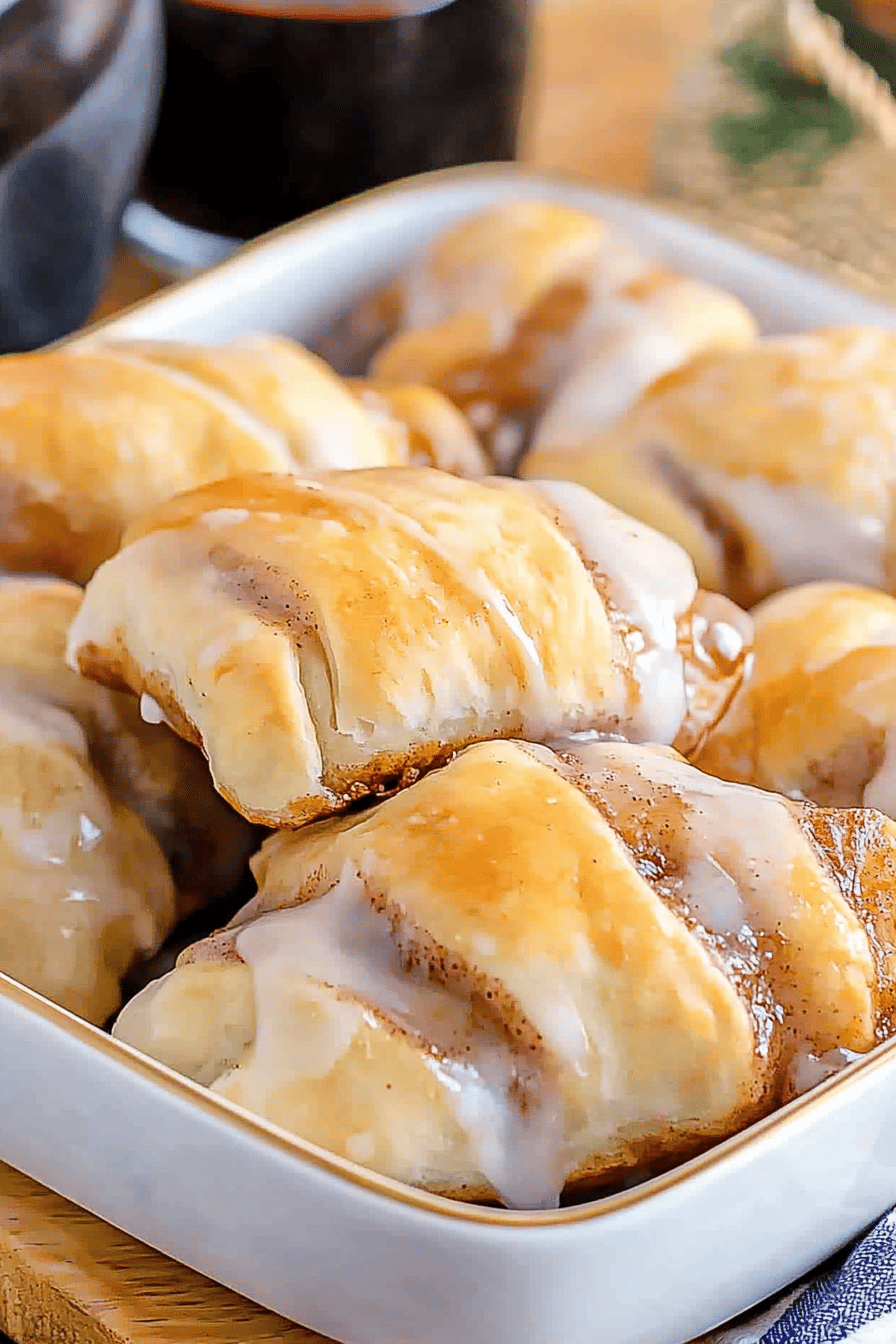
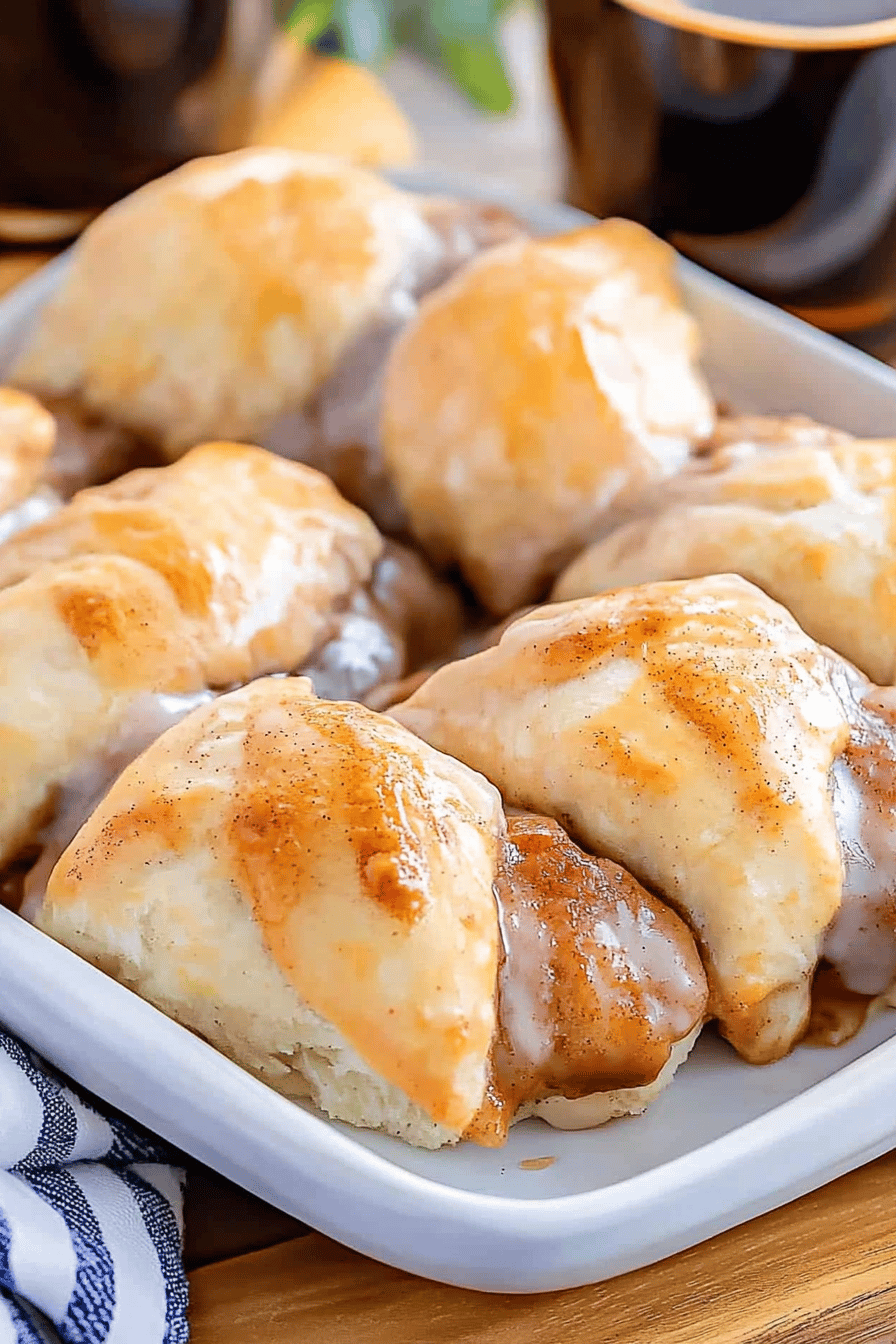
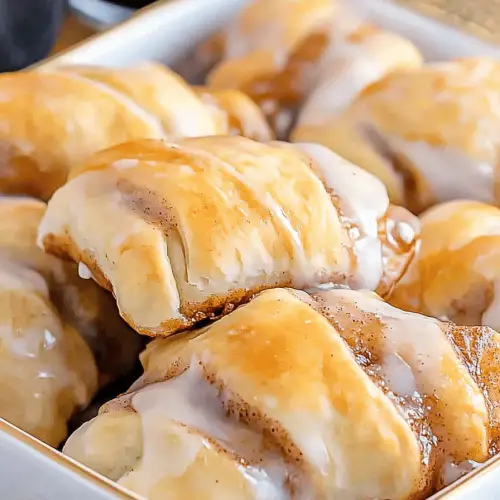
Turn the dough out onto a lightly floured surface. Gently knead it for just a minute or two until it’s smooth and elastic, adding a tiny bit more flour if it’s still too sticky to handle. Roll the dough into a large rectangle, about 12×18 inches. It doesn’t need to be perfect! Now, generously spread the cinnamon-sugar filling evenly over the entire surface of the dough, all the way to the edges. Starting from one of the long sides, tightly roll up the dough. Try to keep it as even as possible. Once rolled, gently pinch the seam to seal it. Now, here’s the fun part – you can slice this log into about 12-15 equal rolls. I usually slice them about 1 to 1.5 inches thick. Arrange the rolls cut-side up in your prepared baking pan. They’ll be a little snug, but they’ll puff up!
Step 7: Bake
Pop the pan into your preheated oven. Bake for 20-25 minutes, or until the tops are golden brown and the centers are cooked through. You can gently lift one to check the bottom; it should be golden too. The kitchen will smell absolutely heavenly at this point, I promise!
Step 8: Cool & Glaze
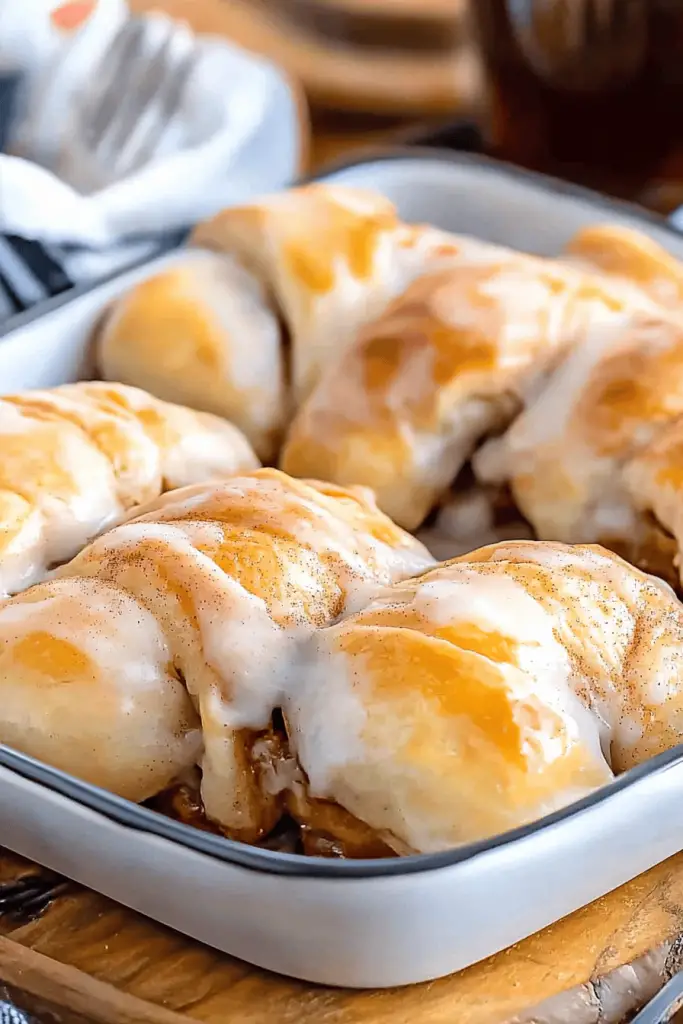
Once they’re out of the oven, let them cool in the pan for about 10-15 minutes. While they’re cooling, whisk together the 1 cup of powdered sugar, 2-3 tablespoons of milk (start with 2 and add more if needed to reach your desired consistency), and ½ teaspoon of vanilla extract until smooth. You want a drizzly but not too thin glaze. Once the rolls have cooled slightly, drizzle the glaze generously over the warm cinnamon crescent rolls. Watching that glaze melt and drip down the sides is pure bliss!
Step 9: Slice & Serve
These are best served warm, right after glazing. You can serve them directly from the pan, or carefully lift them out onto a serving platter. They’re perfect on their own, or with a side of your favorite coffee or tea. Enjoy that moment of pure deliciousness!
What to Serve It With
These cinnamon crescent rolls are practically a meal in themselves, but they do pair wonderfully with a few things to make them even more special. For a relaxed breakfast, they’re divine with a steaming mug of freshly brewed coffee. The richness of the coffee cuts through the sweetness beautifully. If you’re going for a more leisurely brunch vibe, I love serving them alongside some fresh fruit like berries or sliced oranges – the brightness of the fruit is a lovely contrast. A mimosa or a light sparkling cider would also be delightful! For a sweet dessert, these are fantastic served warm with a scoop of vanilla bean ice cream or a dollop of whipped cream. It’s pure decadence! On those chilly evenings when you just need a cozy snack, they’re perfect on their own, perhaps with a glass of milk or a warm herbal tea. My family loves them as an after-school treat; they’re gone in a flash!
Top Tips for Perfecting Your Cinnamon Crescent Rolls
I’ve made these cinnamon crescent rolls so many times, and over the years, I’ve picked up a few tricks that really make a difference. Let’s dive into them!
Dough Handling: The key to a tender roll is not overworking the dough. Once the flour is incorporated, mix until *just* combined. A slightly sticky dough is better than a tough one. When you’re rolling it out for the filling, aim for an even rectangle. If it’s springing back, let it rest for 5-10 minutes, covered, and then try again. It relaxes the gluten.
Softened Butter for Filling: Seriously, this is crucial. If your butter is too cold, you’ll tear the dough trying to spread it. If it’s melted, it’ll just ooze out everywhere during baking. Softened means it should be spreadable at room temperature, giving easily when you press it with your finger.
Even Cinnamon Distribution: Make sure your cinnamon and sugar are mixed well before spreading. I’ve had a few rolls that were super cinnamon-y in one bite and not at all in another. Whisk them together thoroughly in a small bowl first. A pinch of salt in the filling also helps to balance the sweetness and enhance the cinnamon flavor.
Tight Rolling: When you roll up the dough with the filling, try to do it as tightly as you can without tearing it. This creates those beautiful, distinct swirls in your finished rolls. If you have gaps, the filling might escape more during baking.
Spacing in the Pan: Don’t overcrowd the pan initially, but don’t leave too much space either. They need a little room to expand, but they should be touching or very close when they go into the oven. This encourages them to bake upwards and become fluffy.
Doneness Test: While the golden-brown color is a great indicator, sometimes ovens vary. If you’re unsure, you can insert a toothpick into the center of a roll. It should come out clean, with maybe a few moist crumbs attached, but no wet batter.
Glaze Consistency: For the glaze, start with the lesser amount of milk and add more a teaspoon at a time. You’re looking for a consistency that’s thick enough to coat the rolls but thin enough to drizzle easily. If it gets too thin, just whisk in a bit more powdered sugar.
“I don’t know if I’ve ever eaten a better cinnamon crescent rolls. The rub alone is wonderful, but the sauce??? Over the top!”
Ingredient Swaps: If you find yourself without brown sugar, you can use granulated sugar mixed with a tablespoon of molasses for a similar effect, though the texture might be slightly different. For the cinnamon, you could add a pinch of nutmeg or cardamom to the filling for a different flavor profile. I once tried a bit of finely chopped pecans in the filling, and it was divine!
Storing and Reheating Tips
These cinnamon crescent rolls are absolutely best enjoyed fresh and warm, but they do store surprisingly well for a few days. Here’s how I usually handle leftovers:
Room Temperature: If you know you’ll be finishing them off within a day or two, you can simply cover the pan tightly with plastic wrap or foil and leave them on the counter. They’ll stay delicious, though the glaze might get a little sticky. Make sure they’ve cooled completely before covering to avoid trapping steam, which can make them soggy.
Refrigerator Storage: For longer storage, up to 4-5 days, pop them into an airtight container in the refrigerator. This is especially a good idea if your kitchen is warm. They’ll still be tasty cold, or you can reheat them!
Freezer Instructions: These freeze beautifully, both before and after baking! If freezing unbaked rolls, place them in the pan, cover tightly with plastic wrap, then foil, and freeze. When ready to bake, thaw them in the refrigerator overnight, then let them come to room temperature for about 30 minutes before baking as directed (you might need to add a few extra minutes to the bake time). If freezing baked rolls, let them cool completely, then wrap them individually or in small batches in plastic wrap, followed by a layer of foil or a freezer-safe bag. They can be stored in the freezer for up to 2-3 months. Thaw overnight in the refrigerator.
Glaze Timing Advice: If you plan to store them, I sometimes wait to glaze them until just before serving, especially if I’m reheating. This keeps the glaze looking its best. If you are glazing before storing, make sure the rolls are completely cool. For frozen baked rolls, reheat them gently in a low oven (around 300°F/150°C) for about 10-15 minutes until warmed through, then add the glaze.
Frequently Asked Questions
Final Thoughts
So there you have it – my tried-and-true recipe for the most comforting, delicious cinnamon crescent rolls you’ll ever make! I truly believe this recipe is special because it strikes that perfect balance between being wonderfully indulgent and surprisingly approachable. The aroma that fills your kitchen as they bake is just the beginning of the joy they bring. They’re a reminder that sometimes, the simplest ingredients can create the most magical results, and that sharing baked goods is one of the best ways to connect with loved ones. If you’re a fan of classic cinnamon flavors and crave that soft, tender texture, these are an absolute must-try. I hope they bring as much warmth and happiness to your kitchen as they do to mine. If you give these a whirl, please let me know how they turn out in the comments below – I’d love to hear about your baking adventures and any little twists you might have added! Happy baking!
cinnamon crescent rolls
Ingredients
Dough
- 0.5 cup warm milk
- 2.25 teaspoon active dry yeast
- 0.25 cup granulated sugar
- 2 large eggs
- 0.5 cup unsalted butter melted
- 4 cup all-purpose flour
- 1 teaspoon salt
Filling
- 0.75 cup brown sugar packed
- 2 tablespoon ground cinnamon
- 0.5 cup unsalted butter softened
Glaze
- 1 cup powdered sugar
- 2 tablespoon milk
- 0.5 teaspoon vanilla extract
Instructions
Preparation Steps
- In a small bowl, combine warm milk, yeast, and 1 tablespoon of the granulated sugar. Let stand for 5-10 minutes, until foamy.
- In a large bowl, whisk together the remaining granulated sugar, eggs, and melted butter. Stir in the yeast mixture.
- Gradually add the flour and salt, mixing until a soft dough forms. Turn the dough out onto a lightly floured surface and knead for 8-10 minutes, until smooth and elastic.
- Place the dough in a greased bowl, cover, and let rise in a warm place for 1-1.5 hours, or until doubled in size.
- While the dough is rising, prepare the filling by mixing together the brown sugar and cinnamon in a small bowl. In a separate bowl, cream the softened butter.
- Once the dough has risen, punch it down and roll it out into a large rectangle, about 12x18 inches.
- Spread the softened butter evenly over the dough, leaving a small border. Sprinkle the cinnamon-sugar mixture over the butter.
- Starting from the long edge, tightly roll up the dough. Cut the roll into 12 equal slices.
- Place the rolls cut-side up in a greased 9x13 inch baking pan. Cover and let rise for another 30 minutes.
- Preheat oven to 375°F (190°C). Bake for 15-20 minutes, or until golden brown.
- While the rolls are baking, prepare the glaze by whisking together powdered sugar, milk, and vanilla extract until smooth.
- Drizzle the glaze over the warm rolls before serving.