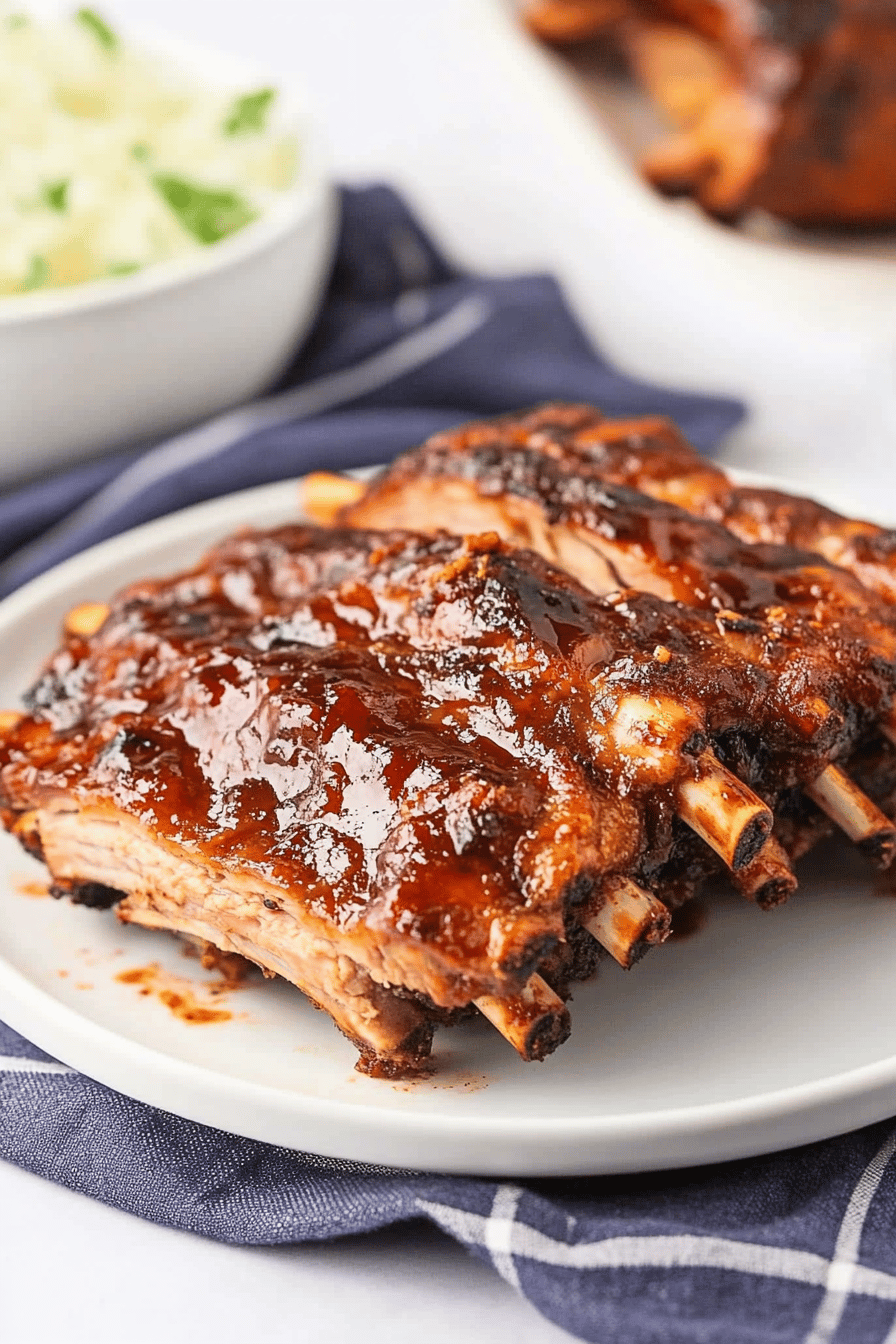
There are some meals that just feel like a hug in food form, aren’t there? For me, that’s always been a plate piled high with perfectly cooked baby back ribs. I remember the first time I attempted making them myself. I was terrified! I’d always pictured ribs as something you *had* to get at a BBQ joint, slathered in secret sauce and cooked for days. But one sweltering summer afternoon, my husband declared he was craving ribs, and I decided to brave it. I was so worried they’d turn out tough or bland, but oh my goodness, the result was spectacular. They were fall-off-the-bone tender, smoky, sweet, and tangy, all at once. My family practically inhaled them. Since then, this has become our go-to, the recipe that gets requested for birthdays, holidays, or just because it’s Tuesday. It’s surprisingly straightforward, and the flavor payoff is just unreal. If you think baby back ribs are too intimidating, trust me, this is the recipe that will change your mind!
Thank you for reading this post, don't forget to subscribe!
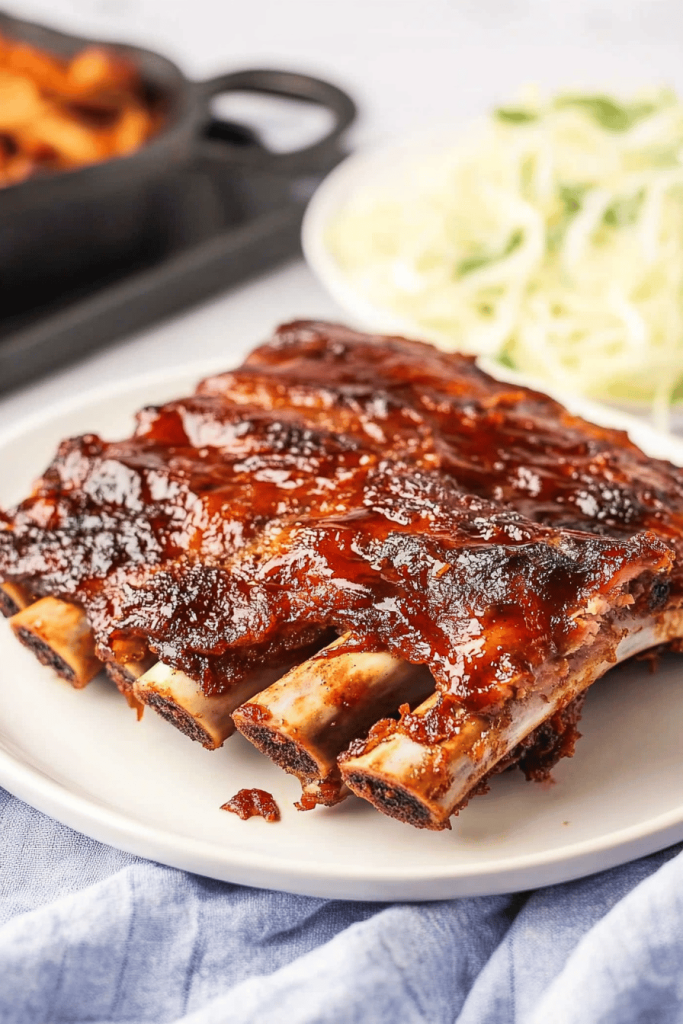
What are some of the best baby back ribs?
So, what makes these baby back ribs so special? Think of them as your ultimate crowd-pleaser, the kind of dish that makes people ask for the recipe the moment they take their first bite. These aren’t your average, run-of-the-mill ribs. They’re incredibly tender, have this amazing depth of flavor from a simple-yet-brilliant dry rub, and are finished with a sticky, slightly sweet glaze that caramelizes beautifully. It’s essentially a foolproof way to achieve that perfect BBQ restaurant quality right in your own kitchen. I like to call them my “Weeknight Wonder Ribs” sometimes, because honestly, they’re manageable even when you’ve had a long day. They’re the kind of food that brings everyone to the table, happy and eager to dig in. It’s comfort food at its finest, no question.
Why you’ll love this recipe?
There are so many reasons why I’ve come back to this baby back ribs recipe time and time again, and I just know you’re going to love it too. First off, the flavor. Oh, the FLAVOR! It’s this perfect symphony of smoky, sweet, and a little bit savory. The dry rub does most of the heavy lifting, infusing the meat with incredible taste before it even hits the oven. And the glaze? It’s just the cherry on top, adding that irresistible sticky sheen and sweet-tangy finish. What I love most, though, is how simple it really is. I know ribs can sound intimidating, but this method is so forgiving. You don’t need fancy equipment or hours of constant attention. It’s mostly hands-off baking time, which is a lifesaver on busy days. Plus, the ingredients are super budget-friendly. A rack of ribs, some spices from your pantry, and a few glaze staples – that’s it! They’re incredibly versatile too. Serve them at a backyard BBQ, a holiday feast, or even a cozy night in. They’re a guaranteed hit every single time, and my kids actually ask for these baby back ribs before they even ask for cake sometimes! They truly stand out from other rib recipes because of that perfect balance of ease and exceptional taste.
How do I make these amazing baby back ribs?
Quick Overview
The magic behind these baby back ribs lies in a two-step cooking process: a slow, moist bake followed by a quick, flavorful glaze finish. We start by tenderizing the ribs in the oven with a bit of liquid, ensuring they’re fall-off-the-bone tender. Then, we crank up the heat and slather them with a delicious glaze that caramelizes beautifully, giving them that classic BBQ look and taste. It’s a simple, effective method that guarantees success, even if you’re new to making ribs. You’ll be amazed at how easy it is to achieve such restaurant-worthy results!
Ingredients
For the Ribs & Dry Rub:
2 racks (about 2.5-3 lbs each) baby back ribs
1/4 cup brown sugar (packed)
2 tablespoons smoked paprika
1 tablespoon chili powder
1 tablespoon garlic powder
1 teaspoon onion powder
1 teaspoon kosher salt
1/2 teaspoon black pepper
1/4 teaspoon cayenne pepper (optional, for a little kick)
1 cup water or apple cider
For the Glaze:
1 cup ketchup
1/4 cup molasses
2 tablespoons apple cider vinegar
1 tablespoon Worcestershire sauce
1 tablespoon brown sugar
1 teaspoon Dijon mustard
Pro Tip: For the best flavor, I always try to get ribs that have a good amount of marbling. Don’t be afraid of a little fat; it’s what makes them tender and juicy!
Step-by-Step Instructions
Step 1: Preheat & Prep Pan
First things first, preheat your oven to 325°F (160°C). You’ll want a large, rimmed baking sheet for this. If you have one, a disposable foil pan works great too, as it makes cleanup a breeze. We’re going to wrap the ribs tightly later, so having a good pan ready is key. Now, grab your baby back ribs. Take them out of their packaging and pat them dry with paper towels. This is a small step, but it helps the rub adhere better. Then, there’s that thin, papery membrane on the bone side of the ribs. You can leave it on, but I always remove it. Just slide a knife under a corner of the membrane and peel it off. It comes off surprisingly easily!
Step 2: Mix Dry Ingredients
In a small bowl, whisk together all the dry rub ingredients: the brown sugar, smoked paprika, chili powder, garlic powder, onion powder, kosher salt, black pepper, and cayenne pepper if you’re using it. Give it a really good mix so everything is evenly distributed. You want a nice, uniform color. This blend is my secret weapon – it’s smoky, slightly sweet, and has just the right amount of warmth. I’ve tried so many variations over the years, but this combination is consistently fantastic for baby back ribs.
Step 3: Mix Wet Ingredients (for the initial bake)
This part is super simple. You’re just going to grab your cup of water or apple cider. I often opt for apple cider because I find it adds a subtle sweetness and fruitiness that complements the pork beautifully. You can absolutely use water, though! The liquid is mainly there to create a steamy environment in the oven, which is crucial for getting those ribs super tender.
Step 4: Apply the Rub & Wrap
Now for the fun part! Generously sprinkle the dry rub mixture all over both sides of the ribs. Don’t be shy! Really rub it in, making sure to coat every nook and cranny. You want that beautiful, earthy-red hue to cover the meat. Once they’re coated, lay one rack of ribs, bone-side down, onto your prepared baking sheet. Pour the cup of water or apple cider around the ribs on the baking sheet. Then, take your second rack of ribs and place it on top of the first rack, meat-side up. This creates a “rack within a rack” situation. Now, here’s the critical step for tenderness: wrap the entire baking sheet tightly with a couple of layers of heavy-duty aluminum foil. Make sure it’s sealed well to trap all that steam. If you’re using a disposable pan, you might need to fold the edges over the foil to secure it.
Step 5: Prepare the Glaze
While the ribs are doing their thing in the oven, it’s time to whip up the glaze. In a medium saucepan, combine all the glaze ingredients: the ketchup, molasses, apple cider vinegar, Worcestershire sauce, brown sugar, and Dijon mustard. Whisk it all together until it’s smooth. Place the saucepan over medium heat and bring it to a gentle simmer. Let it cook, stirring occasionally, for about 10-15 minutes, or until it thickens slightly. You’re looking for a consistency that’s syrupy and coats the back of a spoon. This glaze is incredibly flavorful – it’s sweet from the molasses and ketchup, tangy from the vinegar, and has a nice depth from the Worcestershire and mustard. It’s the perfect counterpoint to the smoky rub.
Step 6: Bake (The Tenderizing Stage)
Pop that foil-wrapped baking sheet into your preheated oven. Let those baby back ribs bake for about 2 to 2.5 hours. The exact time will depend on the thickness of your ribs, but the goal here is pure tenderness. You want the meat to be easily pulling away from the bone. I usually start checking around the 2-hour mark. When you carefully unwrap the foil (watch out for steam!), the ribs should be tender, but not yet falling apart completely. They’ll still have a bit of structure.
Step 7: Glaze and Broil (or Bake Hotter)
Now for the glorious caramelization! Carefully remove the ribs from the foil. Discard the liquid from the baking sheet (or save it for another use, like a base for soup!). If you used two separate racks, you might want to arrange them on a single baking sheet, meat-side up, for this next step. Brush a generous amount of your prepared glaze all over the top of the ribs. You want a nice, thick coating. At this point, you have two options: You can either increase the oven temperature to 400°F (200°C) and bake for another 15-20 minutes, or you can switch your oven to the broiler setting for a few minutes (keeping a very close eye on them!). The goal is to let that glaze bubble, caramelize, and get a little sticky and browned. Watch them closely under the broiler, as they can go from perfectly glazed to burnt very quickly!
Step 8: Rest and Slice
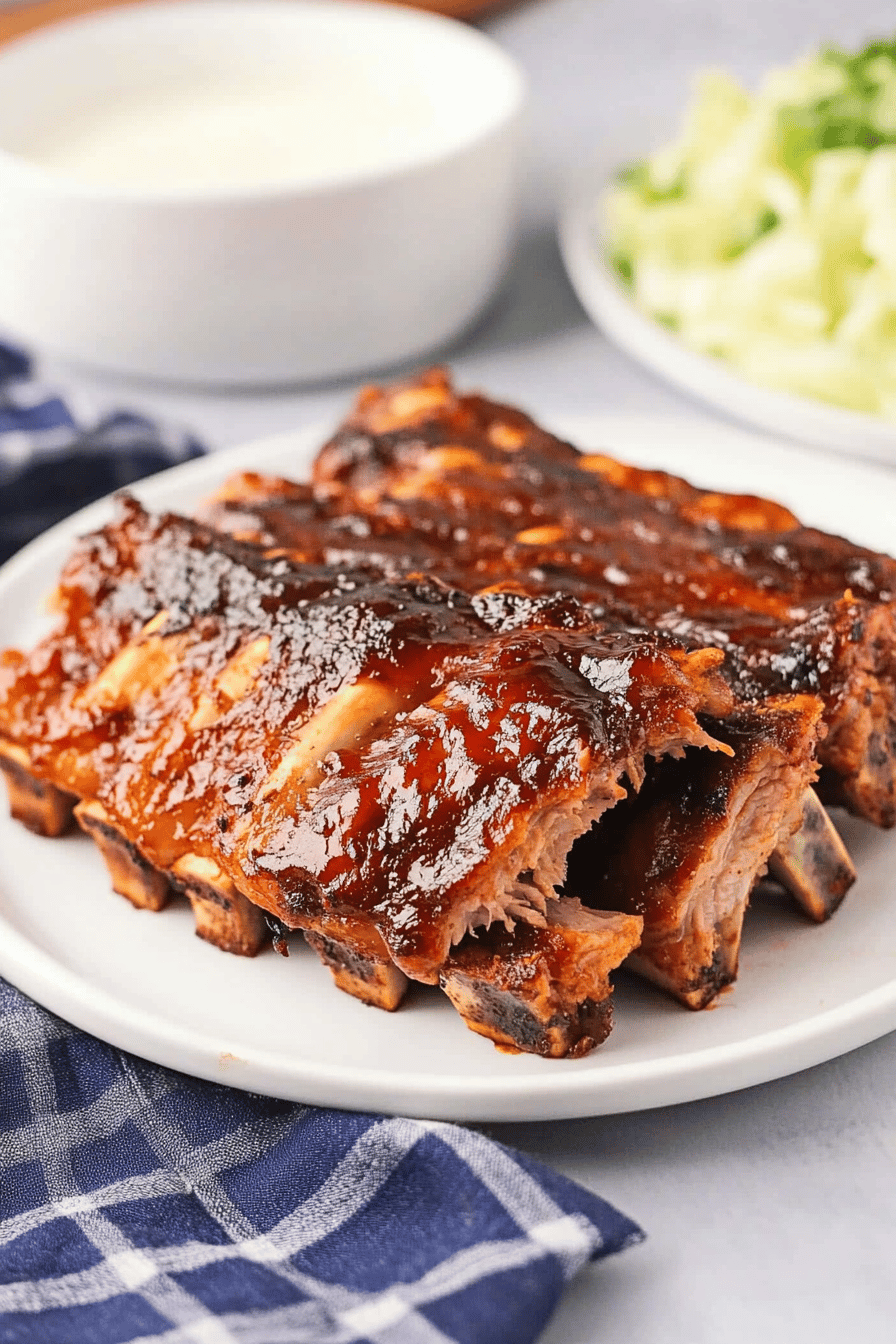
Once your ribs look beautifully caramelized and sticky, take them out of the oven. This is a tough step, I know, but letting them rest for about 10 minutes before slicing is crucial. This allows the juices to redistribute throughout the meat, ensuring every bite is moist and flavorful. After resting, place the ribs on a cutting board. Using a sharp knife, slice between the bones to separate the individual ribs. You’ll see how easily the meat pulls away from the bone – that’s the sign of perfectly cooked ribs!
Step 9: Serve and Enjoy!
Serve your glorious baby back ribs immediately while they’re hot and sticky. The aroma alone will have everyone gathering around the table. These are fantastic on their own, but they also pair wonderfully with classic BBQ sides. I’m talking coleslaw, potato salad, baked beans, cornbread… the works! Prepare for smiles, happy sighs, and maybe even a few sauce-covered faces. It’s pure, unadulterated deliciousness.
What to Serve It With
These baby back ribs are stars on their own, but a little company on the plate never hurt anyone! For a classic, no-fuss meal, you can’t go wrong with creamy coleslaw that offers a cool, crunchy contrast to the rich ribs. Baked beans are another absolute must – the sweet and smoky flavors are a match made in heaven. I also love a good potato salad, something with a bit of tang and mustard to cut through the richness. For a lighter option, a simple green salad with a zesty vinaigrette works wonders. And of course, cornbread! Whether it’s sweet or savory, a warm slice of cornbread is perfect for sopping up any extra glaze or sauce. If you’re feeling adventurous, consider some grilled corn on the cob or a refreshing watermelon and feta salad. These baby back ribs are so versatile, they pair well with almost anything you’d find at a summer picnic or a hearty family dinner. My kids especially love them with mac and cheese – a double dose of comfort food!
Top Tips for Perfecting Your Baby Back Ribs
I’ve made these baby back ribs more times than I can count, and over the years, I’ve picked up a few tricks that really make a difference. For the dry rub, don’t skimp on the brown sugar. It’s not just for sweetness; it helps create that amazing caramelized crust when the glaze goes on. Also, make sure your spices are fresh! Stale spices just won’t give you the flavor punch you’re looking for. When it comes to the rub application, really get in there and massage it into the meat. Don’t just sprinkle it on top; it needs to adhere well to build flavor from the get-go. For the initial bake, sealing the foil really well is key. You want that steam to do its job and break down the connective tissues in the meat, making them super tender. If your ribs seem a little dry after the initial bake, don’t panic. The glaze will add moisture and richness back in. Speaking of the glaze, I sometimes like to add a little heat to mine with a pinch of red pepper flakes or a dash of hot sauce – adjust it to your family’s preference. When you’re glazing the ribs for the final bake or broil, make sure to coat them thoroughly and don’t be afraid to add a second layer if you want an extra sticky finish. Finally, remember that oven temperatures can vary wildly. Get to know your oven, and use a meat thermometer if you’re unsure about tenderness. The goal is for the meat to easily pull away from the bone, but not disintegrate.
Storing and Reheating Tips
Lucky for us, these baby back ribs store and reheat beautifully, meaning you can enjoy that deliciousness for days. If you have any leftovers (which is rare in my house!), let them cool completely at room temperature for about an hour. Then, wrap them tightly in plastic wrap or place them in an airtight container. They’ll keep in the refrigerator for up to 3-4 days. When you’re ready to reheat, there are a few ways to go. My favorite is in the oven. Place the ribs in a baking dish, add a tablespoon or two of water or broth to the bottom of the dish, cover tightly with foil, and reheat at around 300°F (150°C) for about 15-20 minutes, or until warmed through. This method keeps them nice and moist. You can also reheat them on the stovetop over low heat in a skillet with a splash of liquid, or even quickly in the microwave if you’re in a real pinch, though they might not be quite as tender. If you’re planning to freeze them, wrap individual ribs or portions very tightly in plastic wrap, then in foil, and place in a freezer-safe bag. They’ll last for up to 2-3 months. Thaw them in the refrigerator overnight before reheating using the oven method. For the glaze, I often save a little extra to brush on after reheating to bring back that sticky finish!
Frequently Asked Questions
Final Thoughts
There you have it – my absolute favorite way to make baby back ribs. I truly believe this recipe takes all the guesswork out of achieving that perfect, tender, flavor-packed rib experience. It’s the kind of meal that creates memories around the table, and that’s what cooking is all about for me. If you love this recipe, you might also enjoy my Slow Cooker Pulled Pork or my Grilled Pork Tenderloin with Peach Glaze. They’re in a similar flavor profile vein and are also family favorites! I can’t wait to hear how your baby back ribs turn out. Did you try any of the glaze variations? Did your family devour them as quickly as mine does? Please share your thoughts, any tweaks you made, or photos in the comments below – I absolutely love seeing your culinary creations! Happy cooking, and more importantly, happy eating!